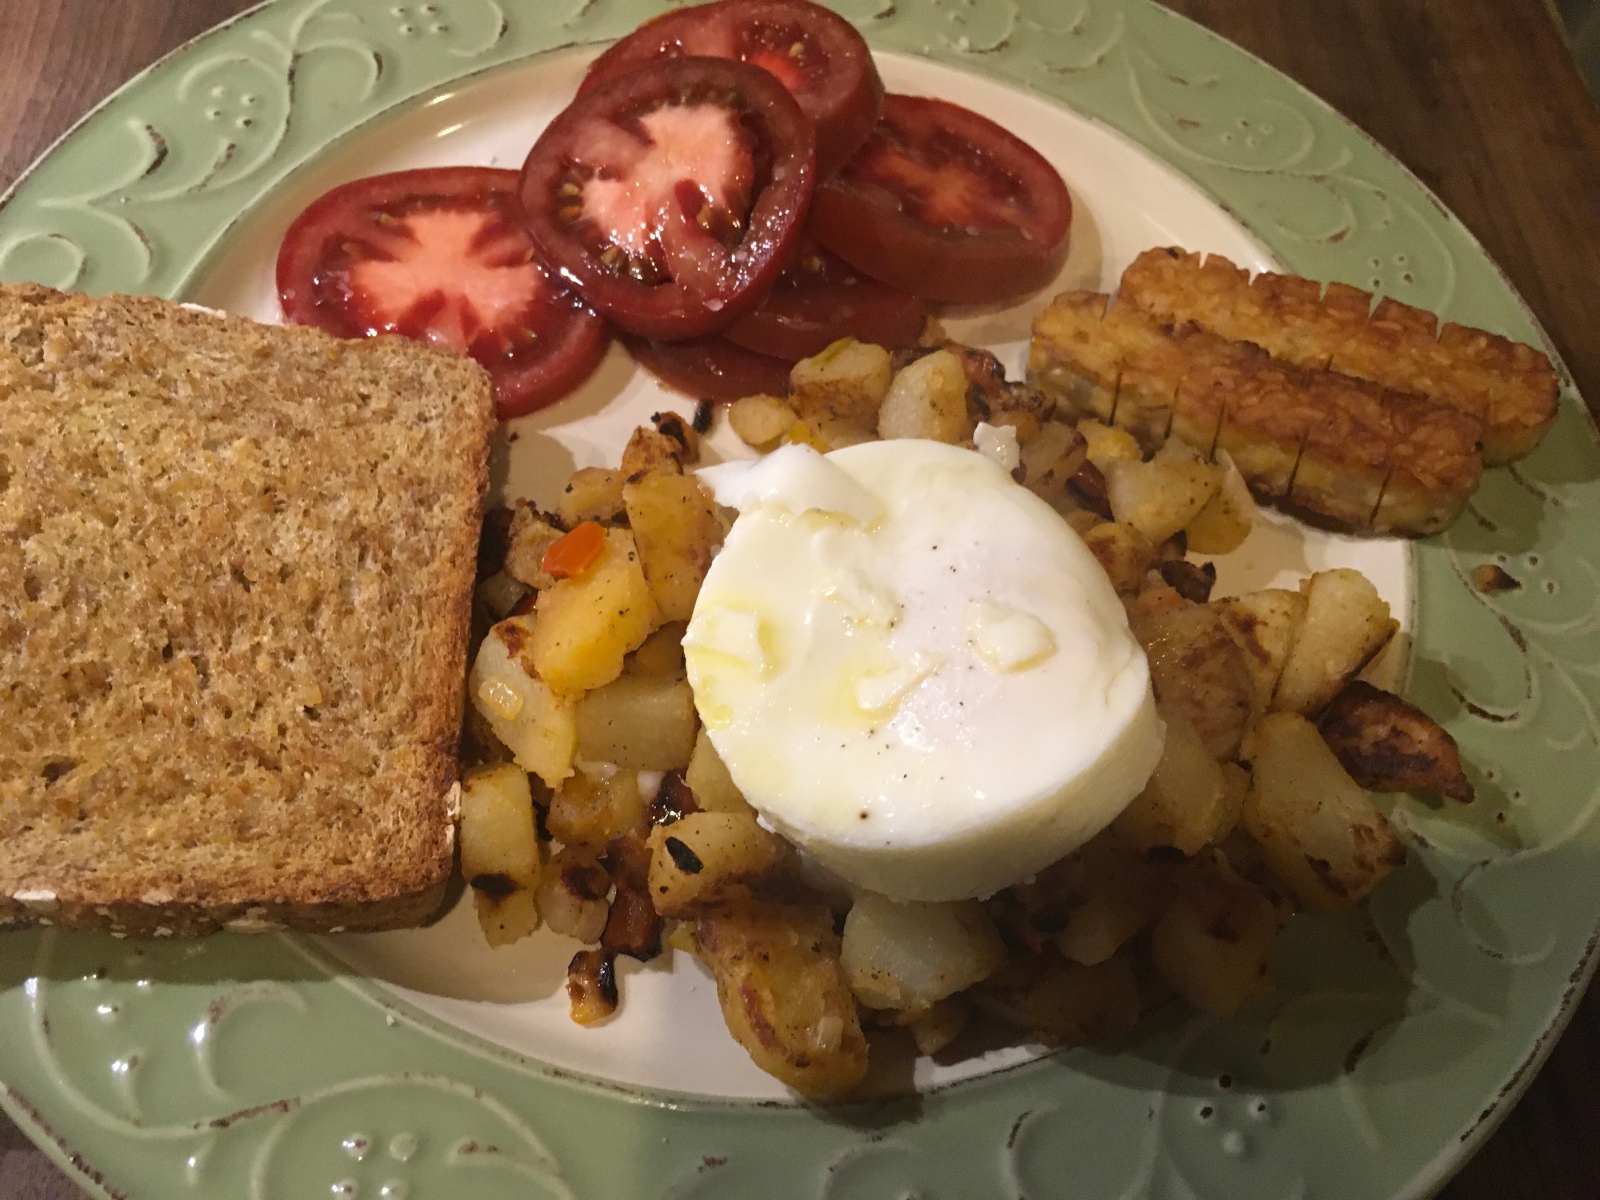
One of the most refreshing and thirst-quenching beverages is infused water with fruits and herbs. Often, you see Cucumber Water at the spa or maybe Watermelon Water in a beautiful hotel lobby. No matter what kind it is, it’s always a little prettier and much tastier version of your daily water.

Lately, you can find almost a wide variety of flavored water at the local market. The problem is that they can be expensive and many of them are carbonated which can leave you feeling bloated. So, why not make your own? It’s super simple by just adding your favorite blend of fruits and herbs to your water and allow to sit in the fridge for 6-12 hours to let the flavors meld.

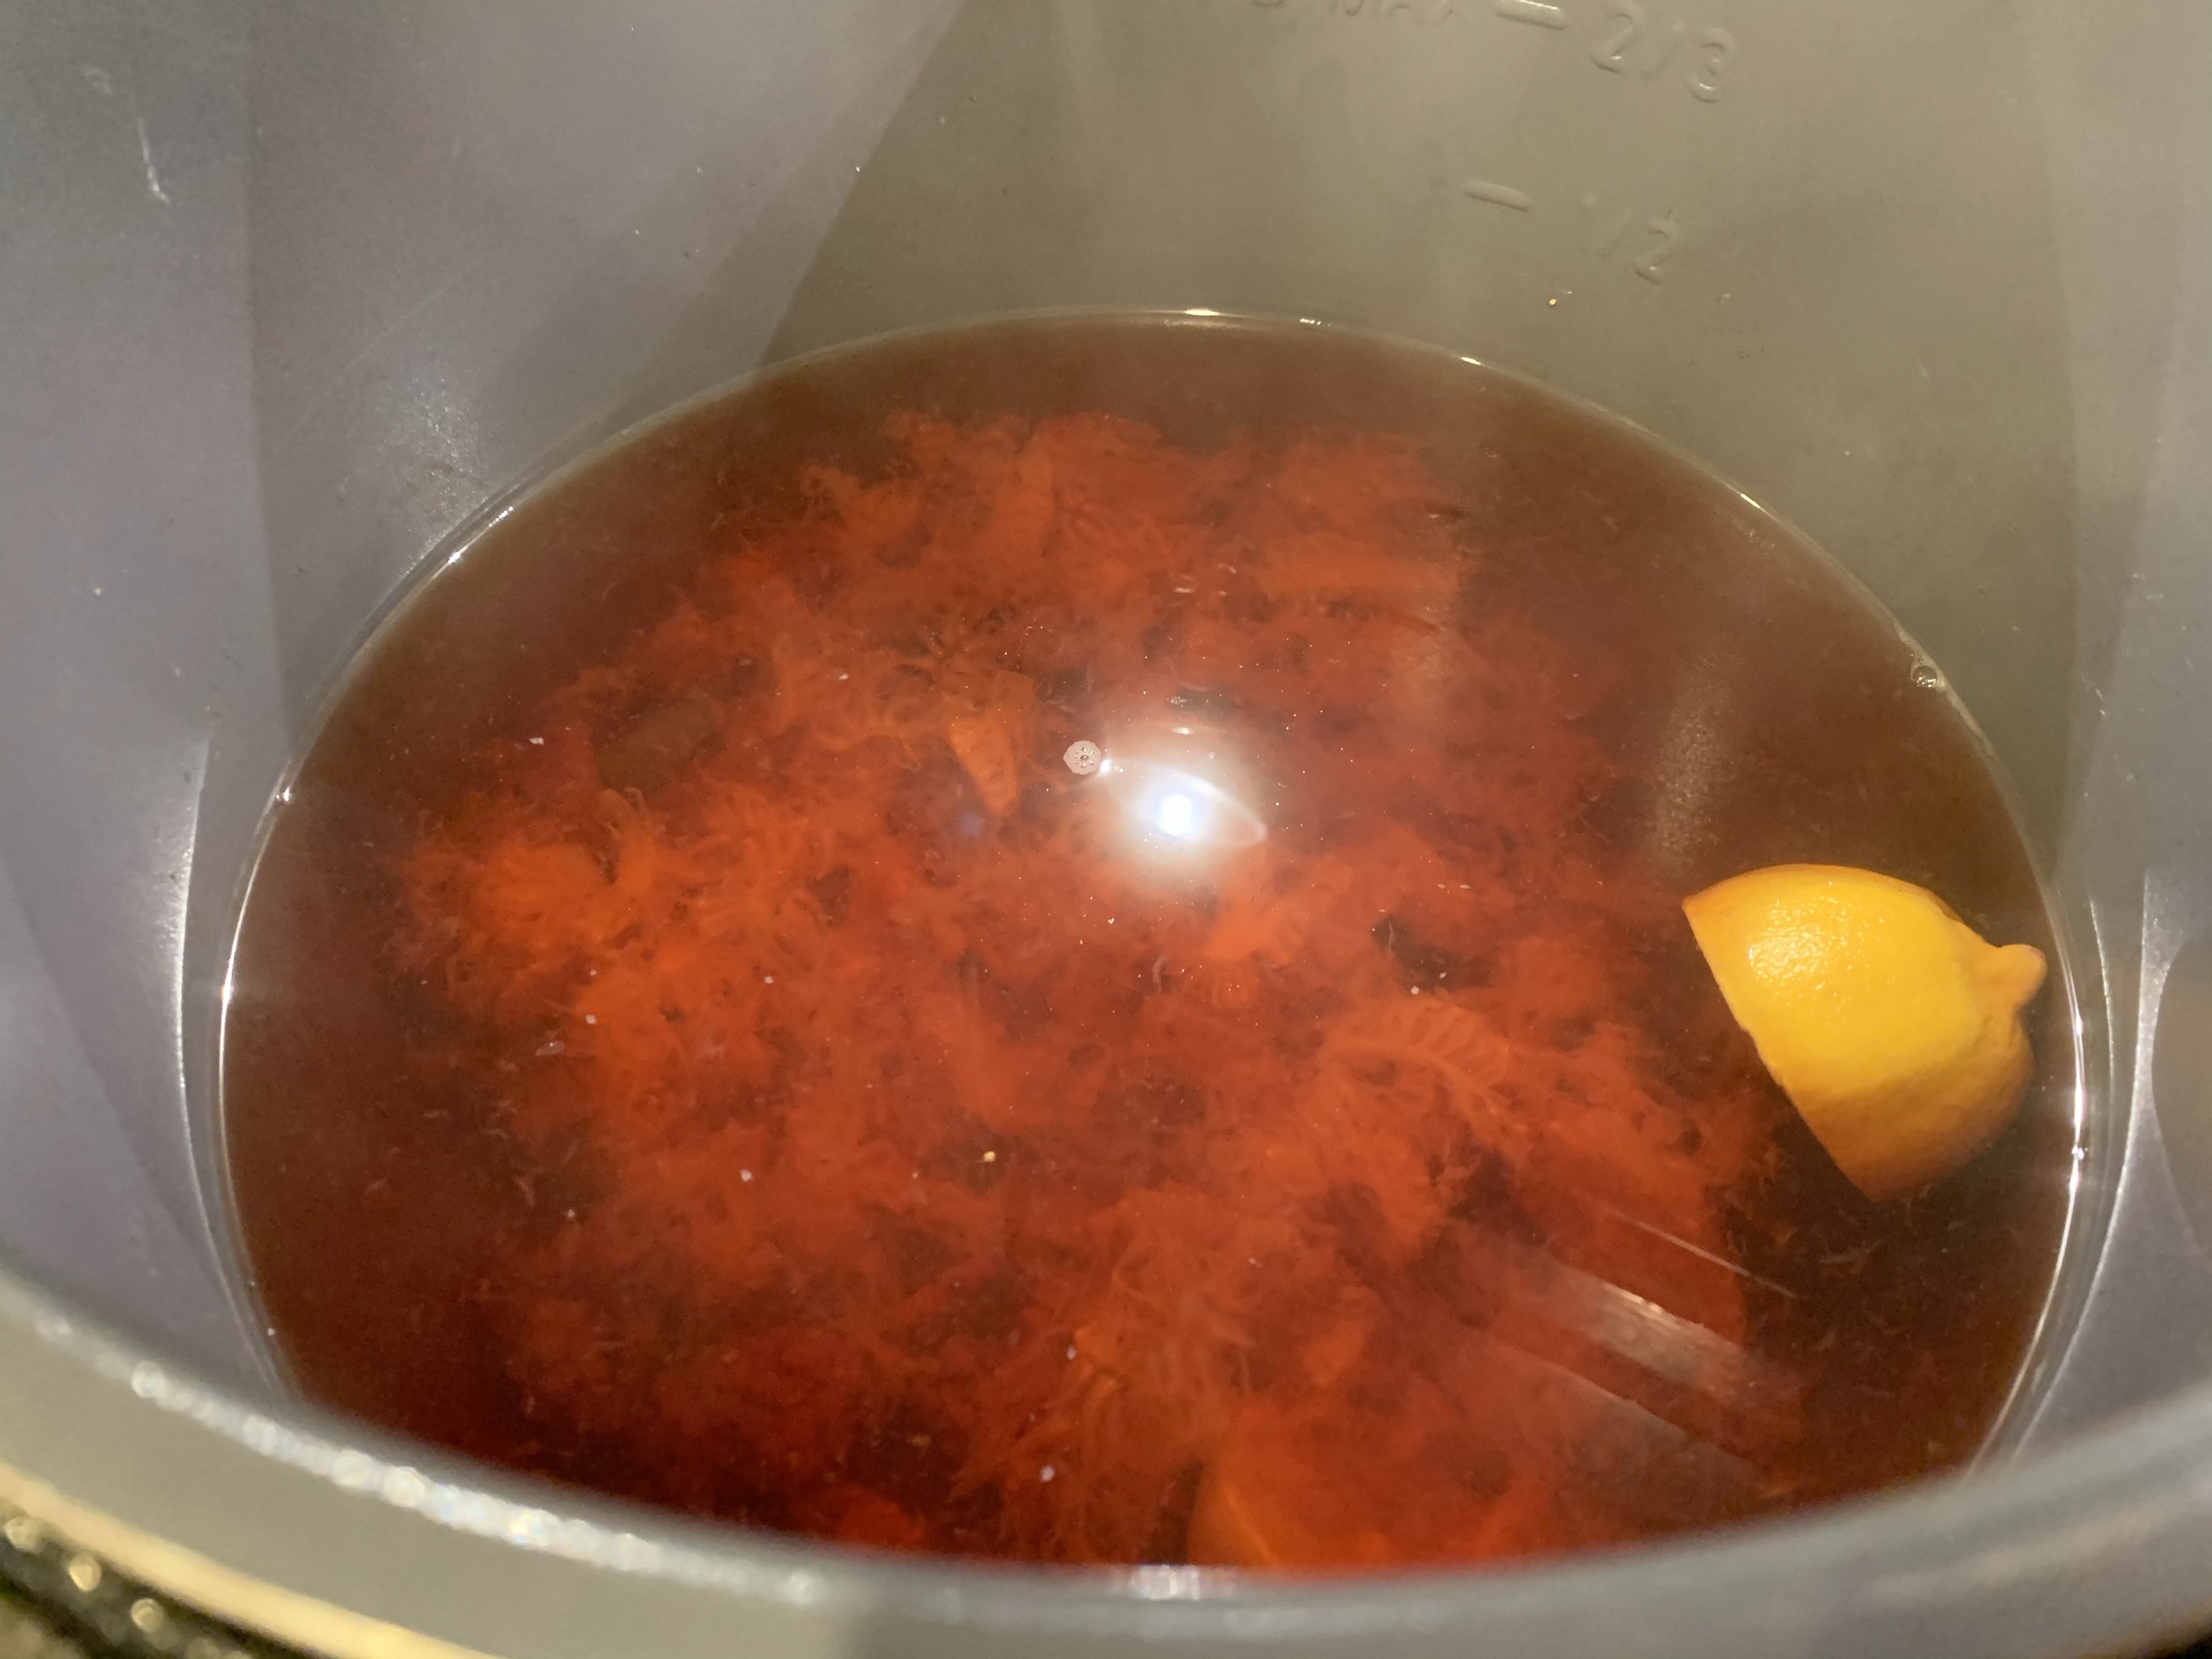
But, what if you can make a more flavorful version in a lot less time? You can….using your Instant Pot. All you need is 2 cups of a fruit, a little citrus fruit, 10 cups of water, and add in some fresh herbs (or spicy peppers) if you choose.

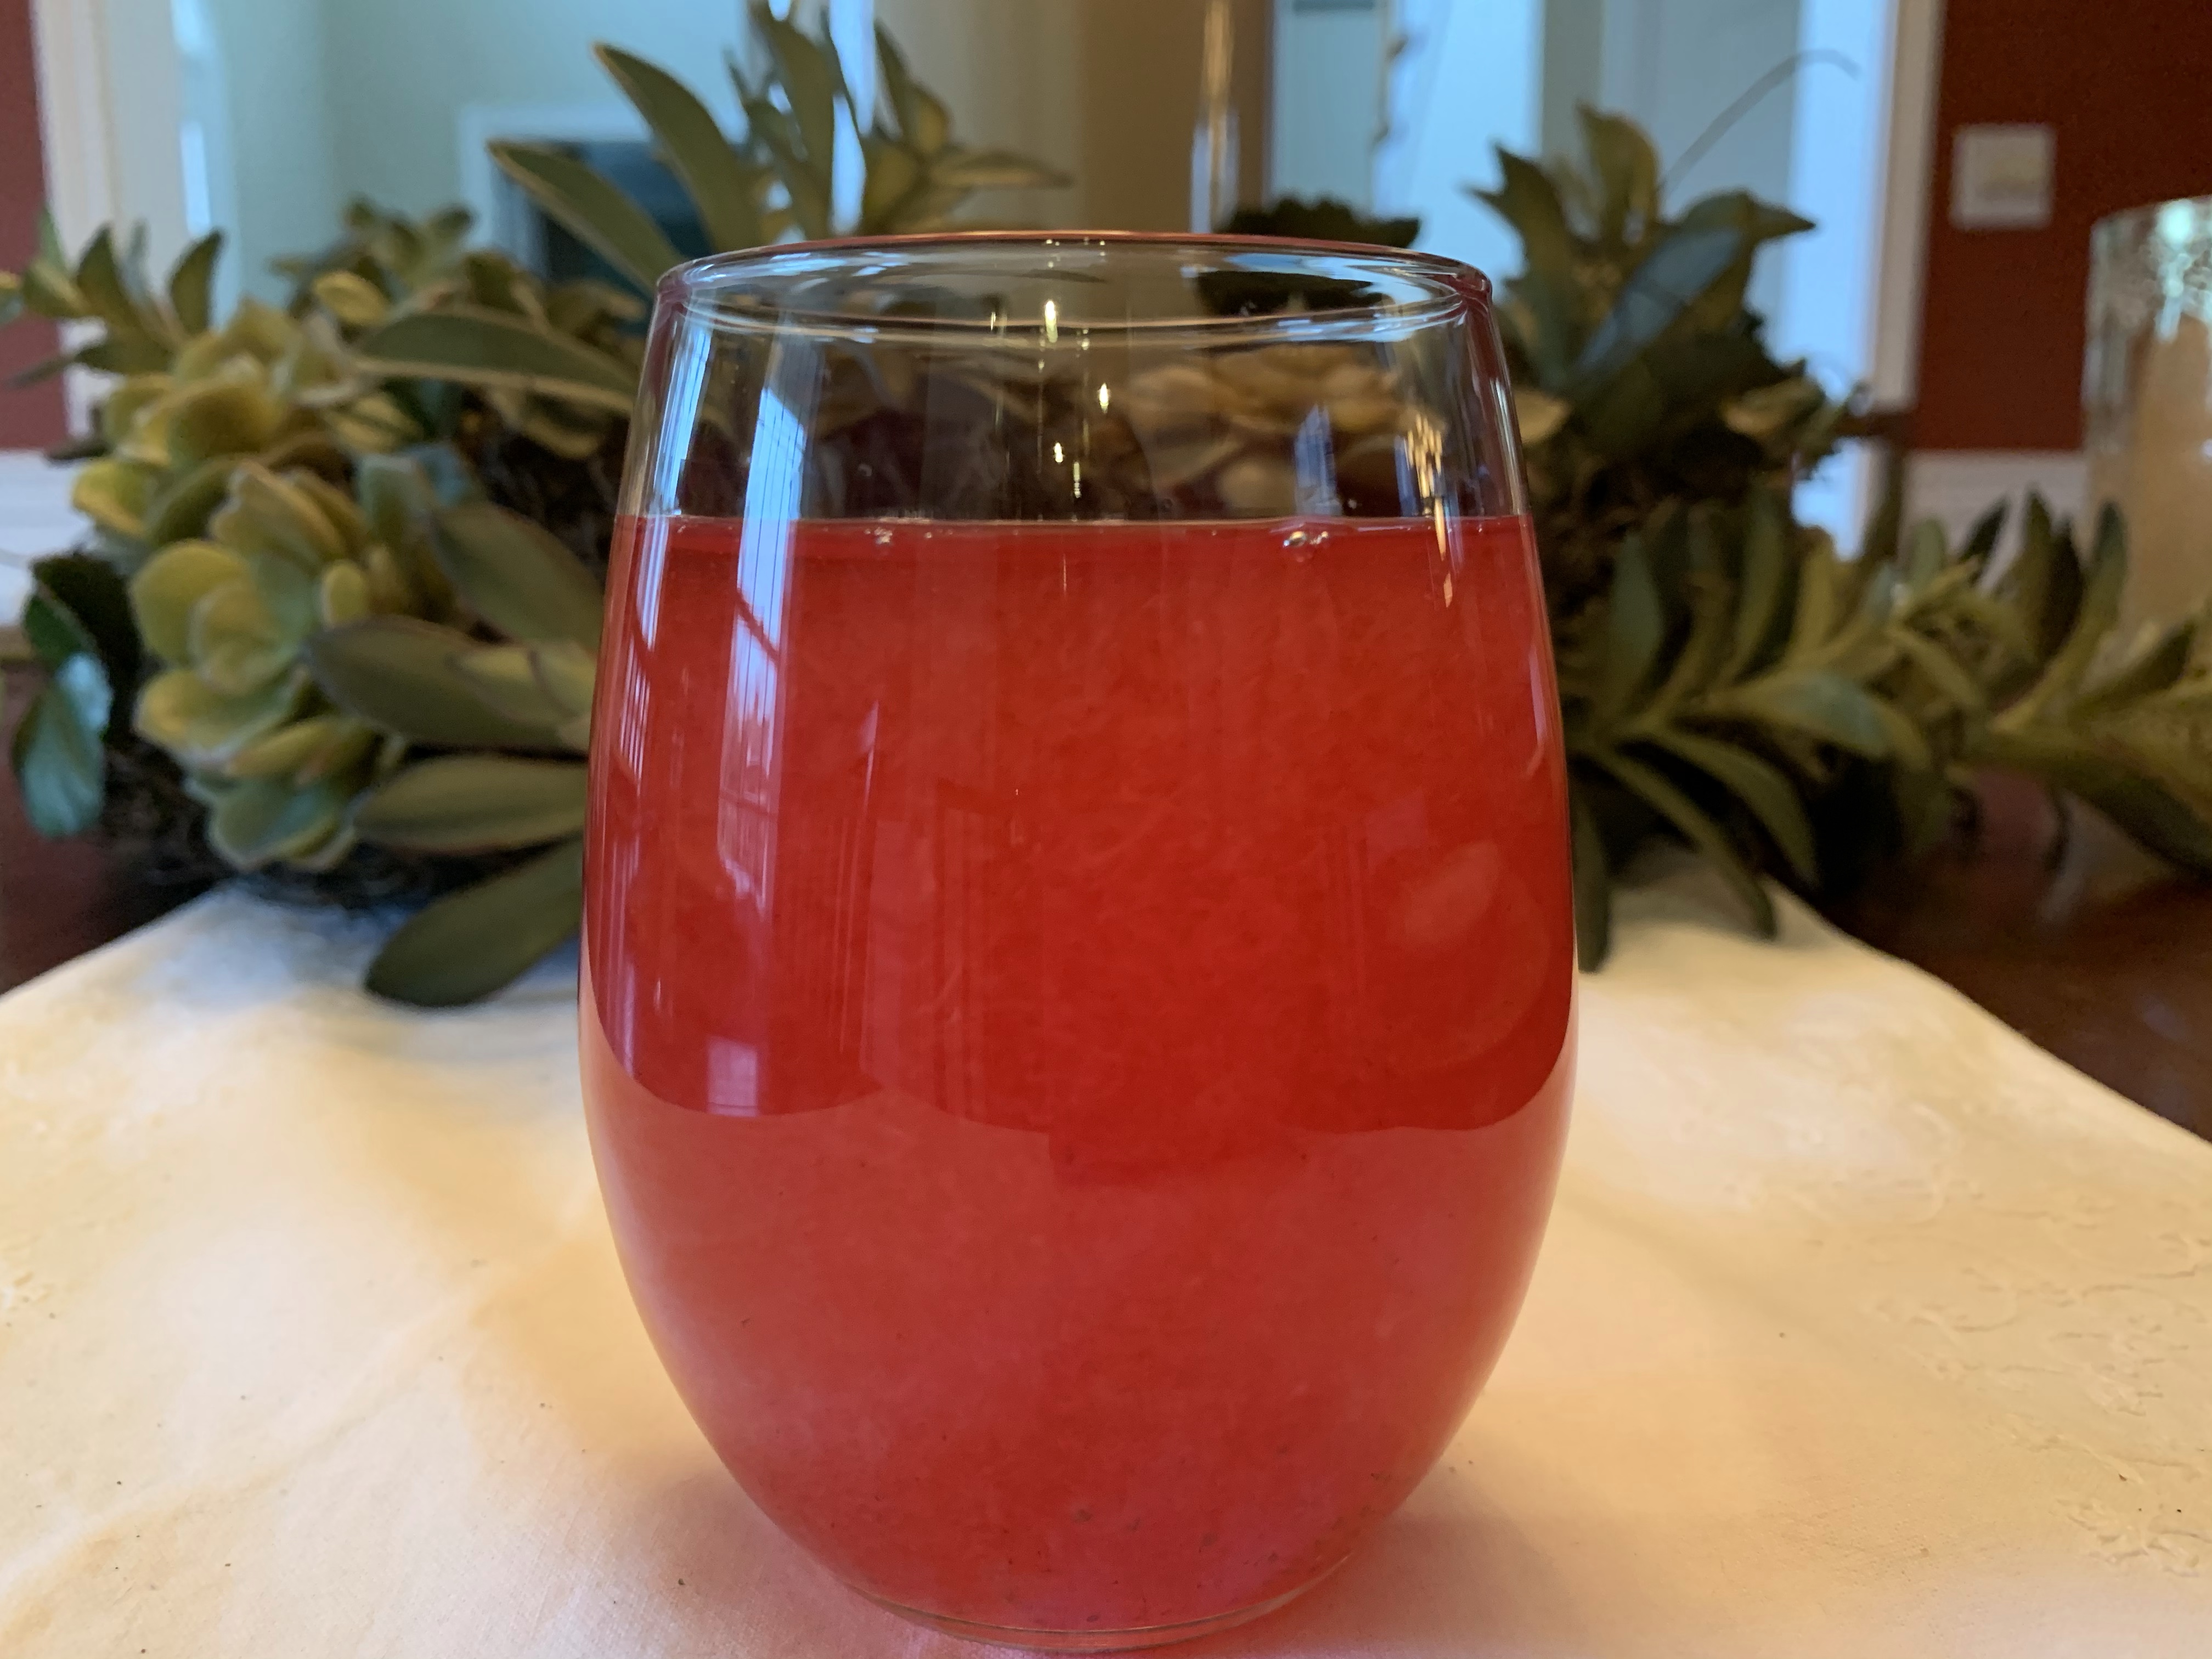
Yesterday, I was cleaning out my fridge and had some strawberries that were on their last day and a handful of blackberries so I decided to give it a try. I ended up deciding to add in a jalapeño for some kick and a small lemon for some tang. I would have liked to have added mint but didn’t have any on hand so this time I didn’t use any herbs. This will last in your fridge for 3-4 days but you will love it so much, it might be gone in 24 hours! No problem since you can easily whip up another batch!

Strawberry, Blackberry, and Jalapeño Infused Water

Ingredients

  • 2 cups of sliced strawberries
  • 1/2 cup of blackberries
  • 1 jalapeño, sliced
  • 1 lemon, sliced
  • 1 sprig of fresh herbs (optional) *mint would go great with this recipe
  • 10 cups of water (I use Spring or Filtered Water)

Directions

  • Place your produce in the instant pot
  • Add in the water
  • Close lid and set pressure to 5 minutes
  • After pressure time is over, do a quick steam release
  • Open instant pot and allow to cool at least 5 minutes before straining the liquid
  • Pour the strained liquid into a pitcher and chill
  • Serve chilled and add ice if preferred. Enjoy!

Tips

  • Pour liquid into ice tray and freeze and add into any of your everyday drinks like iced tea, mocktails, or smoothies,
  • You can use frozen fruit as well
  • Add in more fruit for a stronger flavor
  • Always give your pitcher a stir before pouring into your glass
  • Parents and Grandparents, this is a great way to get your children to drink more water and it’s way healthier than soda or juice!

So, you are making progress on your plant-based lifestyle and what event comes up that can be tempting to just give in to all those indulgent foods for just one day? Super Bowl Sunday! Since I’m a Food TV show junkie, it was hard to see all those hot wings, hot dogs, and um, the burger recipes! Those were the hardest!

On New Year’s Eve, the day before we started our new eating lifestyle, Jeff asked me what I wanted as “last meat meal” for a while. My request? Steak…no. Fried Chicken…no. Not even Ribs! All I wanted was a burger and he gave me a great one filled with yummy horseradish on the inside. It was fantastic!

So, naturally, it was a burger I wanted on Super Bowl Sunday and after much research on not only taste but the ingredients list as well, we decided on the Beyond Burger.

Since these are pre-made burgers, this post isn’t really a recipe but what we used to grill them and how we served them.

First, after reading some reviews, we discovered that sometimes they fall apart when grilling. To combat that, Jeff had the great idea. He put them in the freezer for about 20 minutes just to firm them up, not to freeze.

To season, we sprinkled a little garlic powder and onion powder on each side.

For a little extra flavor, we created a little grilling sauce.

Savory Grill Sauce

  • 2/3 cup Dale’s Sauce, low sodium
  • 1/3 cup soy sauce, low sodium
  • 1 tbsp, Worcestershire sauce

Note: You will definitely not use all this but we like to keep extra sauce in the fridge to add depth to our grilled dishes. A splash is always great in vegetable soup as well!

After heating the grill, we brushed a little clarified butter directly on the grill and grilled each side for 5-6 minutes. As soon as we put them on the grill, we brushed them with a little of the grill sauce and then again when we flipped them over.

The internal temperature should be 165 degrees but they will still be quite pink in the middle. This is due to the beet juice in them that helps create a similar color burgers have when they are cooked. I promise you, they are cooked all the way through!

We served them on top of Brioche Buns made with wheat flour and spread mustard on each side. The topping was tomato, carmelized onions, and just a sprinkle of blue cheese for extra flavor.

I served them along side roasted cabbage wedges and air fried french fries…they were soooooo good!

Bottom Line: These definitely helped calm my burger craving and gave me the taste and texture I was looking for. From a nutrition standpoint, these are only a little lower in fat than a real burger…but these have no cholesterol which is huge for us! Will I eat this weekly, no, simply because they are higher in fat than most things I’m eating these days. But as an indulgent dish that stayed within my Plant-based guidelines, these were a winner!

My test run of being on a plant-based pescatarian has come to an end, so what did I learn and what is next? My plan had been to blog everything I ate every day..that got boring quickly for me so you noticed the past couple of weeks, I just blogged on new recipes that I tried and liked. But what did I really get out of this experience?

First, I feel amazing! When I eat, I feel extremely satisfied. While weight loss was not my primary goal, I did want to lose those 5 lbs that came along with the “natural state of a females’s life in her 50’s”, lol! But I ended up losing 7 lbs without even trying..my doctor actually told me not to lose another pound! Now, I just need to start working out to tone it up! Jeff lost 16 lbs….he looks great!

One of the most amazing changes is in my taste buds! They are so much more receptive to new flavors and it seems like I can differentiate between individual flavors a lot better! I’ve tried things again that I’ve always hated, like salmon and sweet potatoes. Sweet potatoes are still not my favorite, but I don’t mind them roasted in some dishes. I’m now over the top about Salmon…I love it! My salmon foil packs are one of my favorite recipes because everything is in one packet and there is no clean up. I’ve loved experimenting with completely plant-based vegetarian recipes and look forward to trying even more!

So what does Plant-Based really mean? At first, I really had a hard time figuring it out. What could or couldn’t I eat? Well, it turns out to be very simple. Plant-based means 80% of your diet is plants..that’s it. Can you eat meat? Yes, as part of the other 20%, meaning not often. That is where the Pescatarian or Pesco-Vegetarian comes in. They don’t eat meat but allow fish, dairy, and eggs. So in a nutshell if I’m going plant-based, only 20% of the time do I eat the fish, dairy, and eggs. It’s working for me and I really love it!

Here is a little diagram that I found to help you if you are thinking about a plant-based life-style .

As you can see, you are allowed to eat meat on a plant-based diet; it’s just something to be avoided. So if you are wanting to try and eliminate most animal protein, a pescatarian version might be a great idea for you!

Another huge change we made was cutting out processed foods. I truly believe that has been the key in the weight loss. If a food has an ingredient in it that I can’t pronounce, it’s not going in my mouth. Carrots and hot sauce is my favorite snack along with air-popped popcorn Who knew how much fiber is in that!

So what now? Well, both Jeff and I have decided to continue on with this eating plan. We both feel great, have a lot more energy, and love trying all these new foods and recipes. Will we have meat again? Probably but even if we do, it will be rare. I wonder if I will even enjoy it like I used to?

Anyway, if you are looking to shift your diet to more natural and healthy style of eating, this is a great food plan choice! I will keep you posted on fun, new, and tasty recipes to start you on your path!

“Make a habit of trying new things”…..

That quote really speaks to me right now because one of the things that I love about my January Journey into a more Plant-Based diet is that I have had to make myself try new things for this to work. That is kind of scary for two reasons. One, it can be a little difficult to spend money on ingredients for a dish you might not even like. Two, if you don’t like it, there aren’t a lot of options left in the fridge, ha ha! Since Jeff is really trying to do this with me, the pressure is really on.

January is usually a time for comfort food (Jeff loves his comfort food) but that is a little bit of a challenge for a newbie not eating meat. One of our favorite dishes in the winter is Shepherd’s Pie which is basically ground lamb with veggies topped with a mashed potato crust. Needless to say, it’s not considered what we call “healthy”. However, I did make a healthier version and blogged about it a few years ago for those of you still eating meat but wanting a lighter spin on it if you want to check it out.

https://reciperealities.net/2014/04/05/quick-shepherds-pie-a-clean-eating-magazine-recipe/

So, “Shepherd’s Pie” is a very loose term for today’s recipe but the way it is layered seemed a little similar to that of the traditional version. Instead of lamb, my base is primarily eggplant and lentils. Then, I used polenta, which is stone ground corn kernels similar to grits, to replace the mashed potatoes. While not your meaty original, it was extremely “comforting and satisfying!

Eggplant and Lentils Shepherd’s Pie

Directions

  • 1 tbsp olive oil
  • 1 large yellow onion, peeled and diced
  • 1 large eggplant, stemmed and cubed
  • 1 large red bell pepper, seeded and diced
  • 1 tbsp garlic, minced
  • 2 tbsp balsamic vinegar
  • 1 tsp onion powder
  • 1 tsp each of salt and pepper
  • 8 cloves garlic, peeled and minced
  • 4 oz mushrooms, sliced (I used portabella)
  • 9 oz pckg steamed lentils
  • 1 tbsp hot sauce
  • Salt and freshly ground black pepper to taste
  • 1 cup chopped basil
  • 3 cups vegetable broth
  • 1 cup polenta/corn grits

Directions

Preheat the oven to 350°F. In a medium bowl, toss the eggplant with salt and allow to rest on the counter for 30 minutes to draw out moisture. Place in a colander, rinse with water, then press between paper towels to dry.

Heat the olive oil on medium-low heat in a large saucepan and sauté for 10 minutes or until onions are soft. Add water 1 to 2 tablespoons at a time to keep the onion from sticking to the pan.

Add the red pepper, eggplant, garlic, and balsamic vinegar. Cook, covered, for 15 minutes, stirring occasionally, adding more water as needed.

Stir in the mushrooms, and hot sauce.

Sauté for an additional 10 minutes, uncovered.

Bring vegetable broth to a boil in a medium saucepan and add in polenta. Simmer on low 3-4 minutes or until thickened.

Toss the lentils and basil into the vegetable mixture and mix well.

Pour the mixture into a 1 1/2 quart baking dish. 
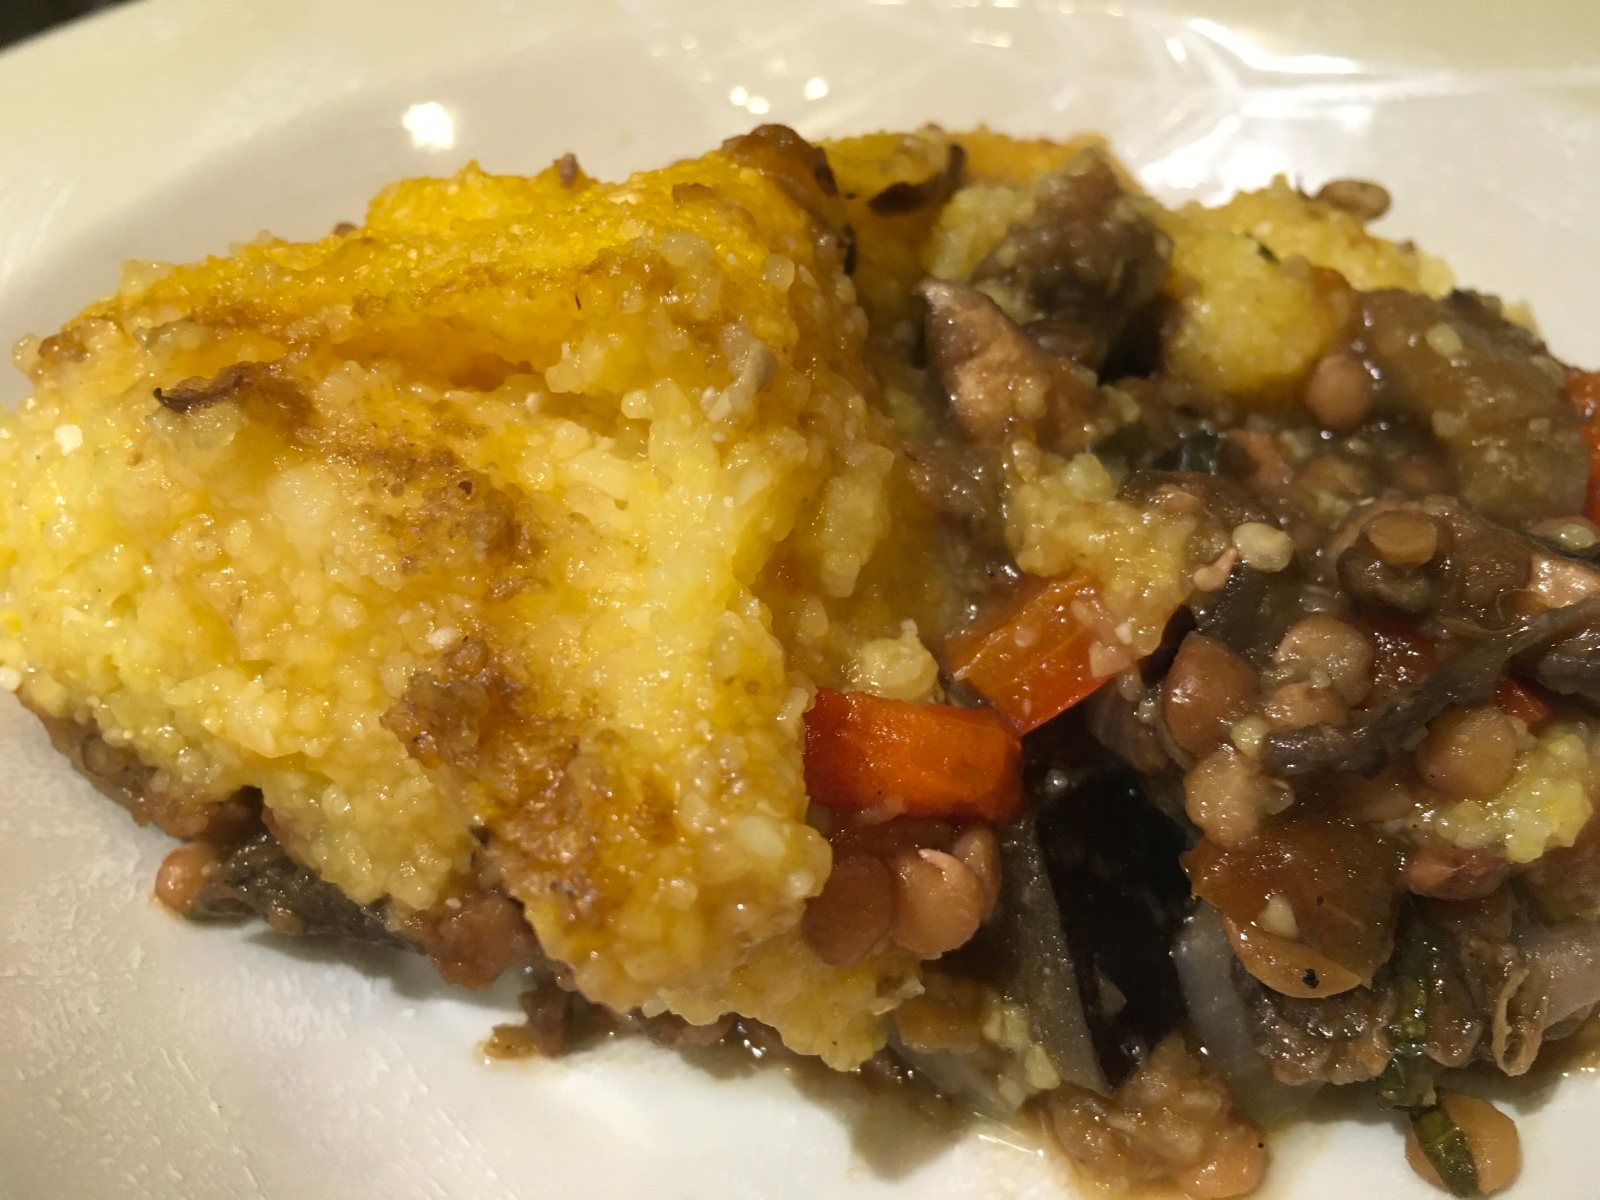
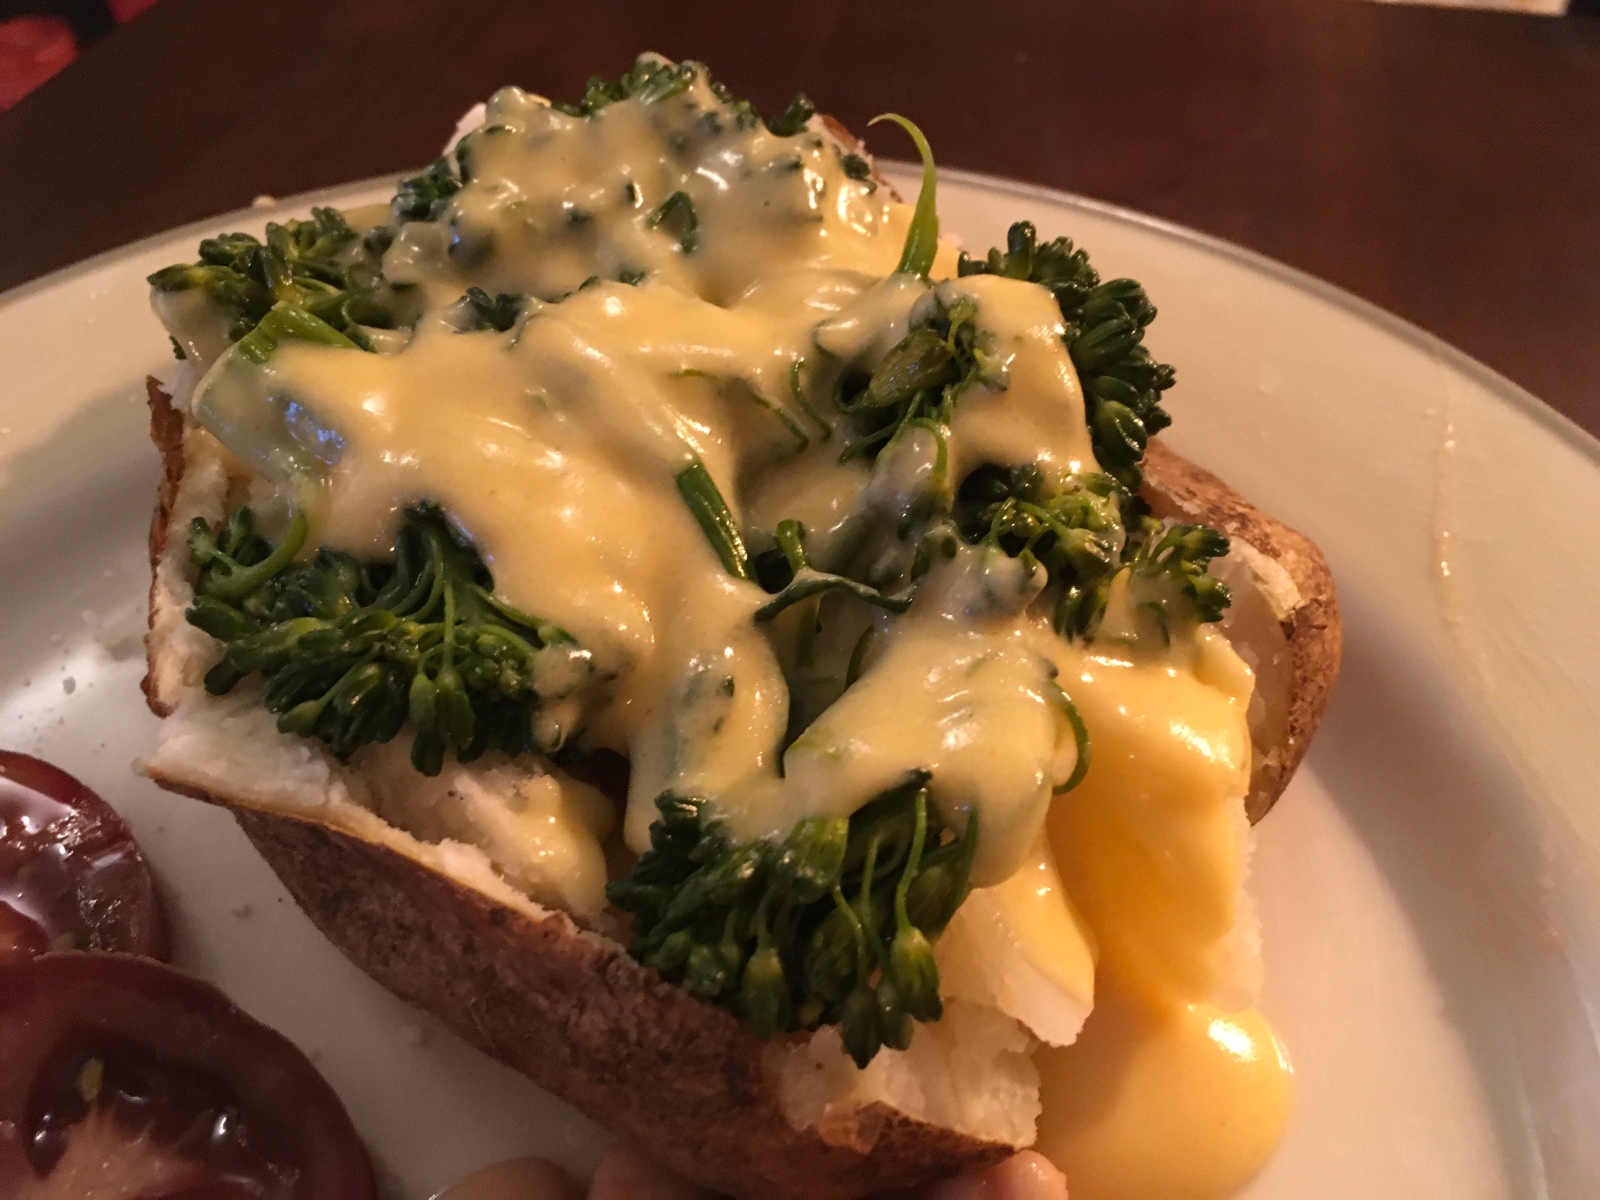
Spoon the polenta over the vegetable mixture.

Bake for 30 minutes. Let rest for 5 minutes on stove top before serving.

Ladle into a serving bowl.

Bottom Line: We really enjoyed this! It felt like I was eating something so indulgent but in actuality it was very light in calories but high in nutrients. Next time I think I will serve it over some braised greens such as Swiss chard is collard for an even more elevated flavor. If you are a meat eater, it would be a side dish. I also think it would be amazing in individual baking dishes. This recipe is a keeper!

“Eat better, not less”….That was my plan for January when I started what I called ” My January Journey into a Plant-Based Pescatarian Diet”. Things are going very well and I’ve noticed that by doing this, I seem to be wasting less food which was one of my resolutions in 2020.

For example, last weekend I blogged about the 4 Bean Chili I recipe I made for my husband and I while we were camping. Chili usually makes a lot so I did send some to my son who is trying to eat healthier and while he isn’t cutting out meat, he is eating a lot less by watching what we are doing. If you missed the log post on how to make the chili, click on this link:

https://reciperealities.net/2020/01/21/four-bean-chili-my-january-plant-based-pescatarian-diet-continues/

Anyway, I still had quite a bit of chili left and while I love to eat leftover chili on baked potatoes, I wanted to do something different. So here is a healthier version of a household favorite..Chili Mac!

4 Bean Whole Wheat Chili Mac

Note: the amount of pasta and water you need will depend on how much chili you have left so this recipe is based on having about 4 cups of chili remaining. Adjust as necessary.

Ingredients

  • 4 cups leftover 4 Bean Chili
  • 1 1/2 cups water
  • 1 tablespoon hot sauce
  • 8 oz. whole wheat small macaroni

Optional toppings: shredded cheese, green onions, avocado, cilantro

Directions

In a Dutch oven or soup pot, mix the water, chili, and hot sauce. Simmer on low-medium heat. 
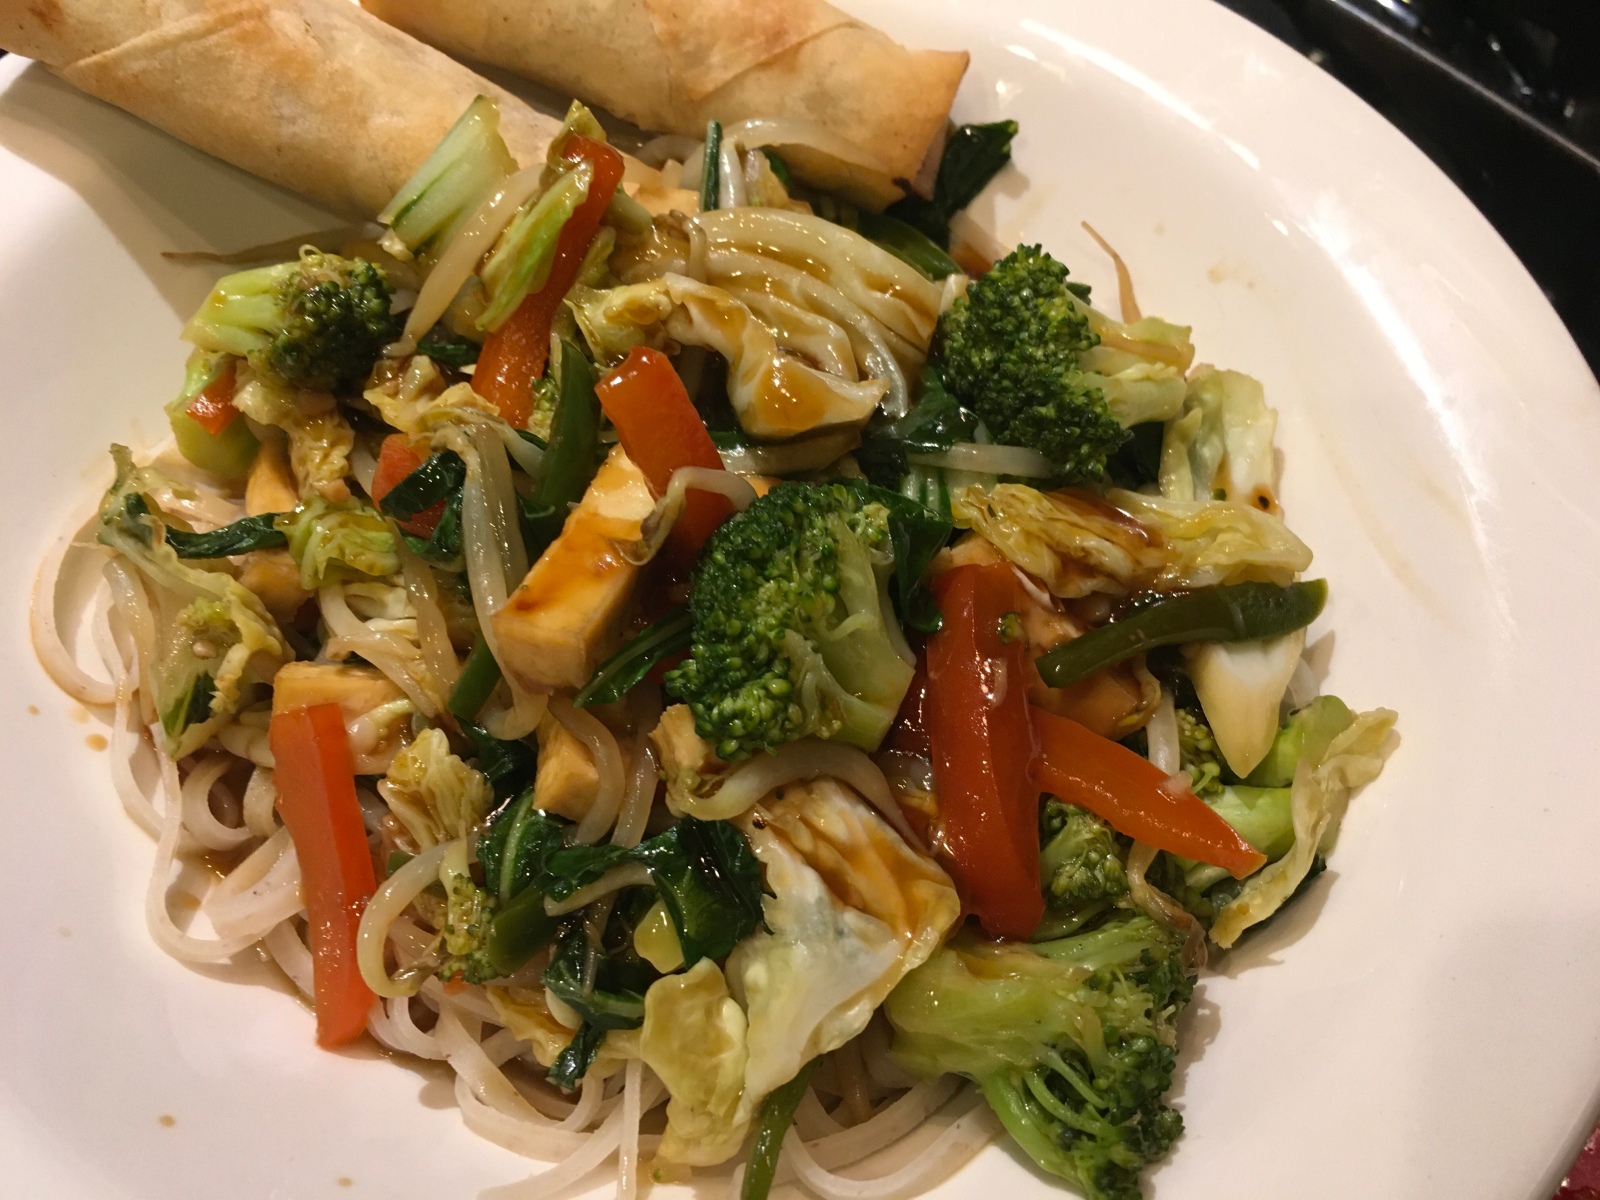
Once heated, add in pasta stirring well and cover. Cook for 15 minutes or until pasta is tender.

Spoon into a serving bowl and add toppings if desired.

Bottom Line: This was a great way to serve leftover chili in a new way. It gave it a whole new flavor and texture. If you aren’t using a whole grain, the pasta won’t need as much cooking time. I used Crystal Hot Sauce because it has more of a vinegar base to it more than heat and it was a great way to perk up the flavors so they won’t be diluted by the water. We loved this and hope you do as well!

This past weekend, I ate more fish and potatoes than I would have liked, so this week I’m trying to put the focus back on plants. What better way to do that than a Tofu and Veggie Stir-Fry! My challenge? It is keeping my husband satisfied because he is not a huge tofu fan although he did try my tofu tacos a couple of weeks ago.

I make stir-frys all the time, like the shrimp one I posted recently, so I knew he would be ok even if he had to pick around the tofu. But, I wanted him to LIKE it so I researched a few ways to prepare it and discovered that baking it in the oven was a way to get it dry enough to absorb the flavors of the stir-fry sauce later. So let’s start with the tofu preparation.

Tofu and Veggie Stir-Fry

Ingredients

  • 12 oz package tofu, extra firm
  • 1 red bell pepper, julienned
  • 1 jalapeño, julienned
  • 2 cups broccoli flowerets
  • 2 cups cabbage, chopped
  • 2 cups bok choy, chopped
  • 3 oz mung bean sprouts
  • 1/4 cup water

Stir-Fry Sauce

  • 2/3 cup soy sauce
  • 1/2 cup organic vegetable broth
  • 1/3 cup mirin
  • 2 tablespoons fine granulated sugar
  • 1 tablespoon sesame oil
  • 2 tablespoons olive oil
  • 1 tablespoon minced garlic
  • 1 tablespoon minced ginger
  • 2 tablespoons arrowroot powder
  • 1/4 water

Directions

  • Preheat oven to 400 degrees. Place the tofu in a colander and let drain for 5 minutes.
  • Wrap tofu in a clean dish towel and put something heavy on top of it (I use a cast iron skillet) to help pull out the moisture. Flip it over after 10 minutes, putting something g heavy on top of it.
  • Cut tofu Into 1 inch rectangles and placed on a parchment lined baking sheet.
  • Bake for 30 minutes turning it over half way through.
  • Allow to sit while you make stir-fry sauce and cook your veggies.
  • To make your sauce, combine soy sauce, broth, rice wine, sugar, and sesame oil in a small bowl.

    In a separate bowl, Dissolve the arrowroot powder in 1/4 cup water.

    Heat a pan over high heat; add the cooking oil, swirling to coat; add the garlic and ginger; cook, stirring, until fragrant, about 15 seconds.

    Add the soy sauce mixture; bring to a boil.

    Reduce heat to medium and cook for 1 minute.

    Add the cornstarch solution and cook, stirring, until the sauce boils and thickens. Add water if it gets too thick.

    In a wok, sauté red bell pepper and jalapeño in a couple of tablespoons of stir-fry sauce for about 3 minutes.

    Add in broccoli, cabbage, bok choy, bean sprouts, 1/4 water and 2-3 more tablespoons of stir-fry sauce. Cook on low heat covered for 5 minutes or until veggies are tender.

    In a small bowl, mix 2 tablespoons of the sauce with the tofu, stirring well and add to veggie mixture. At this point, add in add much sauce as you would like…I usually don’t use all the sauce and keep it for other dishes later.

    Serve over brown rice or brown rice noodles.

    Bottom Line: I already love tofu but now I’m an even bigger fan! As far as hubby goes, he actually liked it. Would he have rather had some steak in the mix instead..yes! But it was delicious and he would definitely have it again. I made son for my son, Jarrod, to have the next day and he was not looking forward to it but he actually liked it as well! This was a win, win, win!

    Nothing sounds better on a blustery winter day than a hot bowl of soup or even better….a hearty chili! I have the best chili recipe ever and it is always a hit at any tailgate or whenever I make it for my family. I recently made it for my grandson’s first birthday party in North Carolina So why not make it this weekend while Jeff and I are on a winter camping trip?! Note: It’s more glamping than camping lol!

    Since I am eliminating meat from my diet completely in the month of January, my favorite recipe would have to be adjusted, so I took out the meat, upped my veggies, and added in a can of black eyed peas to create a protein and fiber packed meal! With or without meat, this recipe is hard to beat and with the Super Bowl coming up, it would definitely be a tasty addition to your celebration!

    Ingredients

    • 2 tablespoons olive oil
    • 1 large yellow onion, diced
    • 1 cup carrots, grated
    • 1 cup celery, chopped
    • 1 medium red bell pepper, diced
    • 1 medium yellow bell pepper, diced
    • 2 jalapeños, diced (optional if you like heat)
    • 2 tablespoons garlic, minced
    • 1/4 cup chili powder
    • 1 tablespoon ground cumin
    • 1 tablespoon dried oregano
    • 1 teaspoon onion powder
    • 1 teaspoon cayenne pepper
    • 1 teaspoon paprika
    • One 4-ounce can tomato paste
    • One 12-ounce bottle beer
    • One 28-ounce can diced tomatoes
    • One 15-ounce can black beans, drained and rinsed
    • One 15-ounce can kidney beans, drained and rinsed
    • One 15-ounce can pinto beans, drained and rinsed
    • One 15-ounce can black eyed peas, drained
    • 2 cups organic tomato juice
    • 1 cup water
    • 1 tablespoon dried parsley

    Directions

    Add the olive oil to a large Dutch oven over medium-high heat. Once hot, add the onions, carrots, and celery and sauté on low for about 10 minutes (add in a little water as needed).

    Add peppers and saute until soft, about 4 minutes. Add the garlic and saute until just fragrant.

    Stir in the chili powder, cumin, oregano, onion powder, cayenne, and paprika.

    Cook for about 2 minutes. Stir the tomato paste into the vegetable mixture; this will “toast” it and give the chili more flavor.

    Add the beer and stir up any browned bits on the bottom of the pan.

    Bring to a simmer, and then add the diced tomatoes and beans.

    Add in tomato juice, water, and parsley. Simmer on medium-low for 2 hours, stirring on occasion to keep the bottom from sticking

    Season with salt and pepper to taste.

    Bottom Line: I love this chili with or without meat..It is just a really good and fool proof recipe. You can easily switch up the type of beans you use and add in other veggies like kale. Lentils would also be a tasty idea! I love having leftovers to make a chili stuffed potato or chili nachos using a sweet potato as a topping vehicle. Stay tuned for later this week when I have another creative leftover idea for this yummy dish!

    “Cooking is like life…you learn only when you make mistakes”…Anonymous.

    Well, if that is true, I learned a lot today with my first experience with tempeh! I’ve always loved tofu when it’s prepared well and I thought tempeh would be kind of the same. Nope! It was not a pleasant eating experience and hopefully, the problem is with the cook and not the ingredient. More on that coming up.

    Today’s lunch was a leftover spinach and mushroom quesadilla from a couple of days ago. I didn’t even heat it up and it was still great! My snack was some leftover carrots and cucumbers that I had served with my Layered Mediterranean Dip earlier in the week. I put a little hot sauce on them and chowed down. I truly think I could eat hot sauce on anything.

    So back to my tempeh story….Some of you may be wondering what tempeh even is. I actually had to look it up to see exactly what it was and how it was different from tofu. From what I understand is that tofu is made from condensed soy milk while tempeh is made from fermented soybeans. Tofu is generally flavorless but takes on the flavors of what you are cooking while tempeh has a more nutty flavor.

    Since I was new to tempeh, I decided to start with something basic so I read about different ways to cook it and just decided on something simple…a quick marinade and saute. I started with Lightlife Three Grain Tempeh.

    This is what is looked like straight out of the package. I scored it all the way across so it could take in more of the marinade and then cut it in to one inch wide strips (kind of like fish sticks).

    The marinade was a cup of organic vegetable broth and a tablespoon of soy sauce. I let it marinate for about an hour.

    After marinating, I drained it and sautéed on all sides in a tablespoon of olive oil for a total of about 8 minutes.

    Once it was cooked, it actually didn’t look that bad. I served it with some home fried potatoes topped with a poached egg, some sliced tomatoes, and a piece of Ezekiel bread toast.

    Bottom Line: Minus the tempeh, my meal was pretty great. I added peppers and onions to my potatoes and the addition of the egg made it very filling. As far as the tempeh, it wasn’t the worst thing I’ve ever eaten, but I think I need to do a little more research before I try again. Please help me out by sharing any of your tried and true tempeh recipes!

    “Let food be thy medicine.” Hippocrates.

    This was the opening quote of the 2011 documentary called Forks over Knives that I watched last night on Netflix. It is based on not only eating a plant-based diet like me but also a whole food diet. It was, to say the least, an eye-opener. What I loved about it is that it gave extremely informative facts about the health impacts of omitting animal products from your diet. It was based on real-life stories not those hard to watch scenes of animal cruelty which I just can’t handle. Note: Rumor has it that it will be removed from Netflix on January 15th so if you haven’t watched it yet, do so soon..you won’t regret it!

    While it motivated me to remove even more foods from my diet at some point (most likely dairy), it left me with one question….

    What is the difference between all of these plant-based diets and how does is compare to what I am doing?

    There are vegetarians, flexitarians, pescatarians, vegans, plant-based, and whole-food/plant-based vegetarians and I could go on and on!

    But this chart from Forks over Knifes clears things up a bit:

    So basically, I’m following a Pescatarian diet which excludes all animal flesh but allows fish, dairy, and eggs. But, it is also plant-based because I’m going to limit my quantities of fish, dairy, and chicken and put my focus primarily on vegetables, legumes, and whole grains. I’m also going to limit highly processed food. No more white pastas or rice for me! The only breads I am allowing is whole grain and sourdough (the fermentation process makes this a healthy option). So, that is why I’m calling myself eating plan a Plant-based Pescatarian Diet. Whew..hope that clears things up!

    So Day 3 went pretty well and incorporated lots of good veggies and legumes!

    I started my day with black coffee and some more of the “Mean Greens Juice” from I Love Juice Bar.

    Lunch was a half of a veggie sandwich on whole wheat that included hummus, cucumbers, tomatoes, clover sprouts, and avocado and a side of my Ikarian Longevity soup (see day 1 & day 2 posts for more information).

    My snacks were again pistachios, a green apple and yes, I did eat my two mini snicker snack bars!

    Then came dinner which I again went to an Ikarian recipe from the Blue Zone Kitchen cookbook…Winter Potato Salad. I did make a few small changes from the original recipe such as:

    • Used my Instant Pot to cook my potatoes
    • Used half and half of Organic Vegetable Broth and water instead of all water to cook my potatoes
    • Added thyme and parsley to my potatoes while cooking
    • Omitted arugula (I didn’t have any in hand) and upped the amount of romaine and spinach to compensate
    • Omitted the raw onion and radish which I really don’t care for

    So here is my version of this incredibly tasty dish…

    Ikarian Winter Potato Salad – 6 servings

    Ingredients

      4 cups water
      4 cups organic vegetable broth
      2 pounds baby gold potatoes, peeled and cut into halves
      1 teaspoon dried thyme
      1 teaspoon dried parsley
      ½ cup chopped fresh dill
      ½ cup extra-virgin olive oil
      3 to 5 tablespoons red wine vinegar
      Salt and pepper, to taste
      3 cups spinach, chopped
      2 cups romaine lettuce, chopped

    Directions

    • Place water, vegetable broth, potatoes, thyme, and parsley in instant pot. Set on high pressure for 10 minutes and turn pressure valve to seal. After processing is complete, turn valve to vent and natural release until pressure pin drops. Note: you can also cook your potatoes on the stovetop for about 12 minutes..I just find they turn out creamier in the instant pot.
    • Drain potatoes and allow to cool.
    • In a small bowl, combine dill, olive oil, and vinegar; season with salt and pepper to taste. Whisk until well combined.
    • In a large serving bowl, combine potatoes with dressing and toss well.
    • Just before serving, add remaining ingredients through lettuce and toss to combine. Note: Since my husband was out of town, I only mixed my ingredients for one serving and kept the remaining ingredients separate to avoid them getting soggy soI could enjoy again later.

    I enjoyed this by the fire with a glass of red wine. It truly hit the spot! I don’t have a huge appetite so a side of legumes or sourdough bread might be a great filling addition if you need just a little more. I ant wait to have this again tomorrow for lunch!

    Bottom Line: Day 3 was quite the learning experience for me but I’m enjoying learning and being able to share with others. So far, I haven’t missed meat but I think fish will definitely be added to the menu tomorrow.

    Wow! Today hits the 2 week mark of my adventure and it is going really well! Although, I do have a craving every now and then, especially for chicken, I’m hardly ever hungry and I have a lot of energy. I needed it today because I had an early morning cooking segment in which I made my Healthy Layered Mediterranean Dip with veggies. Here is the recipe….

    https://reciperealities.net/2020/01/13/healthy-layered-mediterranean-dip-all-the-yumminess-but-none-of-the-guilt/

    After the segment, I went to lunch with two of my neighbors and good friends, Zarah and Trisha. Surprisingly, I have never had a veggie or bean burger so I was eager to try one out and had heard that Cazzy’s Grill off Northshore Drive had a really good one! I decided to try that and instead of the fries, I got the succotash. Overall, I think it was a healthy choice. The bun was multi-grain, although I’m not sure if it was all whole grain. I loved the way the actual burger was grilled and had that char similar to a real beef burger. It was very good and as usual, I left with a to-go box so I could enjoy the rest for later.

    Since the NCAA Football National Championship was on, I had no plans to cook and instead, I munched on the Mediterranean dip with veggies and had the rest of my burger. This just proves you can definitely follow this plant-based lifestyle without always being in the kitchen. Tomorrow, is suppose to be a rainy day and I still have some Christmas things to put away so my plan is to peruse the refrigerator and come up with something creative for dinner using ingredients I already have on hand…stay tuned!

    Yesterday was one of those “get things done” days and food was high on the to-do list! First, I spent time in the kitchen prepping my Healthy Layered Mediterranean Dip that I was going to be making on today’s WBIR/Mornings with Fox 43. Its more involved than just preparing the recipe in that you have to make a version that is camera ready and then have another set of ingredients to make on hand. The hardest part is determining how you will plate it and making sure you pack everything you need. Oh, and you have to make something you can actually demonstrate in a 4 minute segment. I’ve been doing it for over 4 years now I love it. Here is the link to this delicious recipe on my blog…

    https://reciperealities.net/2020/01/13/healthy-layered-mediterranean-dip-all-the-yumminess-but-none-of-the-guilt/

    Since Monday is trash pick up, Sunday is usually clean out the fridge day. I found a little leftover salmon, brown rice, and veggies from my Salmon and Veggie foil packs the other night and some leftover broccoli that I fed my granddaughters. I put that all in one bowl, crumbling the salmon, and warmed it in the microwave. Topped with hot sauce, thus made an amazingly satisfying lunch!

    For dinner, I wanted to create something I’ve never had before that was mostly plant-based and that Jeff would enjoy as well. We both love Mexican food but I’ve had a hard time finding tortillas that aren’t highly processed besides corn. Here is where Ezekiel Sprouted Grains Tortillas came in. They were a game changer because they aren’t processed and are backed with protein.

    Time to make some plant-based quesadillas!

    Spinach, Mushroom, and Jalapeño Quesadillas

    Directions

    • 1 tbsp olive oil
    • 1/2 cup onion chopped
    • 1 jalapeño, chopped
    • 2 tbsp organic vegetable broth
    • 1 cup mushrooms, chopped (I used shiitake)
    • 4 oz can green chili’s
    • 2 cup spinach, chopped
    • 1 tsp hot sauce
    • 1 tsp cumin
    • 1 tsp onion powder
    • 1 tsp each of salt and pepper
    • 4 large tortillas, preferably whole wheat or Ezekiel Sprouted Grains
    • 1/2 cup mozzarella pearls (or just freshly shredded)
    • 1/2 cup cheddar, freshly shredded

    Directions

    Preheat oven to 400 degrees. Spray a large baking sheet with olive oil.

    Heat olive oil in a medium skillet and sauté onions and jalapeño on low for about 5 minutes.

    Add in vegetable broth, mushrooms and green chili’s, cooking for an additional 2-3 minutes.

    Add spinach, hot sauce, cumin, onion powder, salt, and pepper. Sauté for about 2 minutes or until spinach is wilted.

    On a tortilla, spread 1/4 of the mixture on one side of the tortilla. Top with some of the mozzarella and cheddar.

    Fold in half. Repeat with remaining tortillas. Note: I only made 3 tortilla and saved a little of the mixture for scrambled eggs later in the week.

    Place on baking sheet and bake for 6 minutes. Turn over and then bake an additional 6 minutes.

    Serve with a side of avocado and your favorite beans. I drained and rinsed a can of pinto beans then added some green chilis and simmered with some vegetable broth. Soooo good!

    Bottom Line: If you had told me a month ago, that I would love this so much, I wouldn’t have believed you! It was absolutely delicious! Even Jeff loved it! If you aren’t doing the whole plant-based diet, I would definitely try this with regular whole wheat tortillas. I can’t wait to make this again! I’m thinking a poached egg would be a great addition on the side!

    It’s January, we are all trying to keep our healthy New Year’s resolutions, and what could be a stumbling block for us? Football! Tonight, we have the National Championship, the NFL Playoffs are going on (Go Titans!), and the Super Bowl is around the corner. What does that mean…food! And usually lots of it is full of calories such as one of our all-time favorite, 7 Layered Mexican Dip. It’s a diet nightmare! Or is it?

    What if we took that famous dip and put a healthy twist on it? Well, I did with my Healthy Layered Mediterranean Dip. Take out those fatty, high calorie refried beans and sour cream and switch it up with hummus and nonfat Greek Yogurt. Throw in some veggies in place of those tortilla chips and not only do you have lighter appetizer, but you are adding in some vegetables that will give you a good dose of your daily fiber and vitamins. Perfect for those that are working on a more plant-based diet, like me! I actually made this dip on a local tv station so here is the link if you want to check it out….

    https://www.wbir.com/video/entertainment/television/programs/fox43/healthy-layered-mediterranean-dip/51-a4c274e1-4076-4968-afd4-50324bcc642f

    Healthy Layered Mediterranean Dip

    Ingredients

    • 8 oz. hummus 
    • 2 artichokes from a can, chopped
    • 1/2 cup pepperocinis, chopped
    • 1/2 cup roasted red peppers, chopped
    • 1/2 cup nonfat Greek yogurt
    • 1 tsp hot sauce 
    • 1/2 cup kalamata olives, chopped
    • 1 cup, grape tomatoes, salted and chopped
    • 1/4 cup feta cheese, crumbled
    • 2 tablespoon parsley, chopped

    Directions

    In an a small serving dish, spread the hummus evenly on the bottom. 
    Layer Artichokes on top of the hummus followed by the roasted red peppers,and then the pepperocinis.
    Mix the yogurt with the hot sauce and dollop the yogurt over the vegetables, then gently spread on top of the layers with a rubber spatula. 
    On top of the yogurt, layer the olives, tomatoes, and feta cheese.
    Sprinkle the parsley on top..WOW, that is an eye pleaser!
    Serve with fresh vegetables or pita chips.

    Bottom Line: I love this dip! It’s so fresh and has a tangy punch to it. Another great serving option would be to serve it as nachos. Just build a plate with either the pita chips or the veggies and pile on the layers. This is a great easy, no cook, but knock your socks off appetizer that will impress your guests! To make ahead, just chop your veggies and put them in plastic snack baggies then assemble right before serving. I hope you enjoyed this as much as we did!

    Days like today make me so grateful that I have a husband that loves to cook almost as much as I do. Not only did he make a big breakfast for my son and our granddaughters but he made dinner for me later that night as well. Yes, his breakfast was not on my diet plan with it’s bacon and sausage. Add in the eggs cooked in a little of the remaining grease, and well, you get the picture. He did offer to make my eggs separately but I just wasn’t that hungry and just enjoyed the company with my coffee.

    We hung out with the “little blonde hooligans” as I call my absolutely adorable granddaughters. Hadley is three and Willa is two; a combo that keeps you on your toes so I didn’t eat much during the day other than an apple. On the way home from dropping them off, we stopped at the Shrimp Dock. This is a small local seafood shop that carries fresh seafood and we are regular visitors. Jeff picked out a pound of medium shrimp that were gorgeous and we headed home for him to make one of our favorite recipes.

    As I said, Jeff loves to cook as well and always has. We got married back in December of 1985 (over 34 years ago) and back then the place to go when you needed a recipe was Southern Living Magazine. Every year for Christmas my mom would buy me their annual cookbook and this is where tonight’s recipe originated…on page 13 from that very first Cookbook she gave us!

    Notice how aged and stained both the cover and recipe page are! Looking at this brings back such good memories. While we have tweaked the old recipe just a little, much of it is still the same so here is our updated version.

    Shrimp Spaghetti with Black Olives

    Ingredients

    • 8 oz whole wheat organic capellini, cooked(reserve some of pasta water to thin sauce, if necessary)
    • 1/3 cup olive oil
    • 1 to 1 1/2 pounds medium shrimp, peeled, deveined, and cut in half
    • 1 cup onion, chopped
    • 1 jalapeño, chopped
    • 3 cloves garlic, minced
    • 2 (16 oz) cans chopped tomatoes
    • 1 tsp oregano
    • 1/2 cup fresh basil, chopped
    • 2 tbsp, capers
    • Salt and pepper, to taste
    • 1/2 cup Italian parsley, chopped
    • 2/3 cup black olives, sliced
    • 4 tbsp Parmesan cheese, freshly grated

    Directions

    Heat oil in a large Dutch Oven over medium-high heat. Add shrimp, onion, jalapeño, and garlic. 
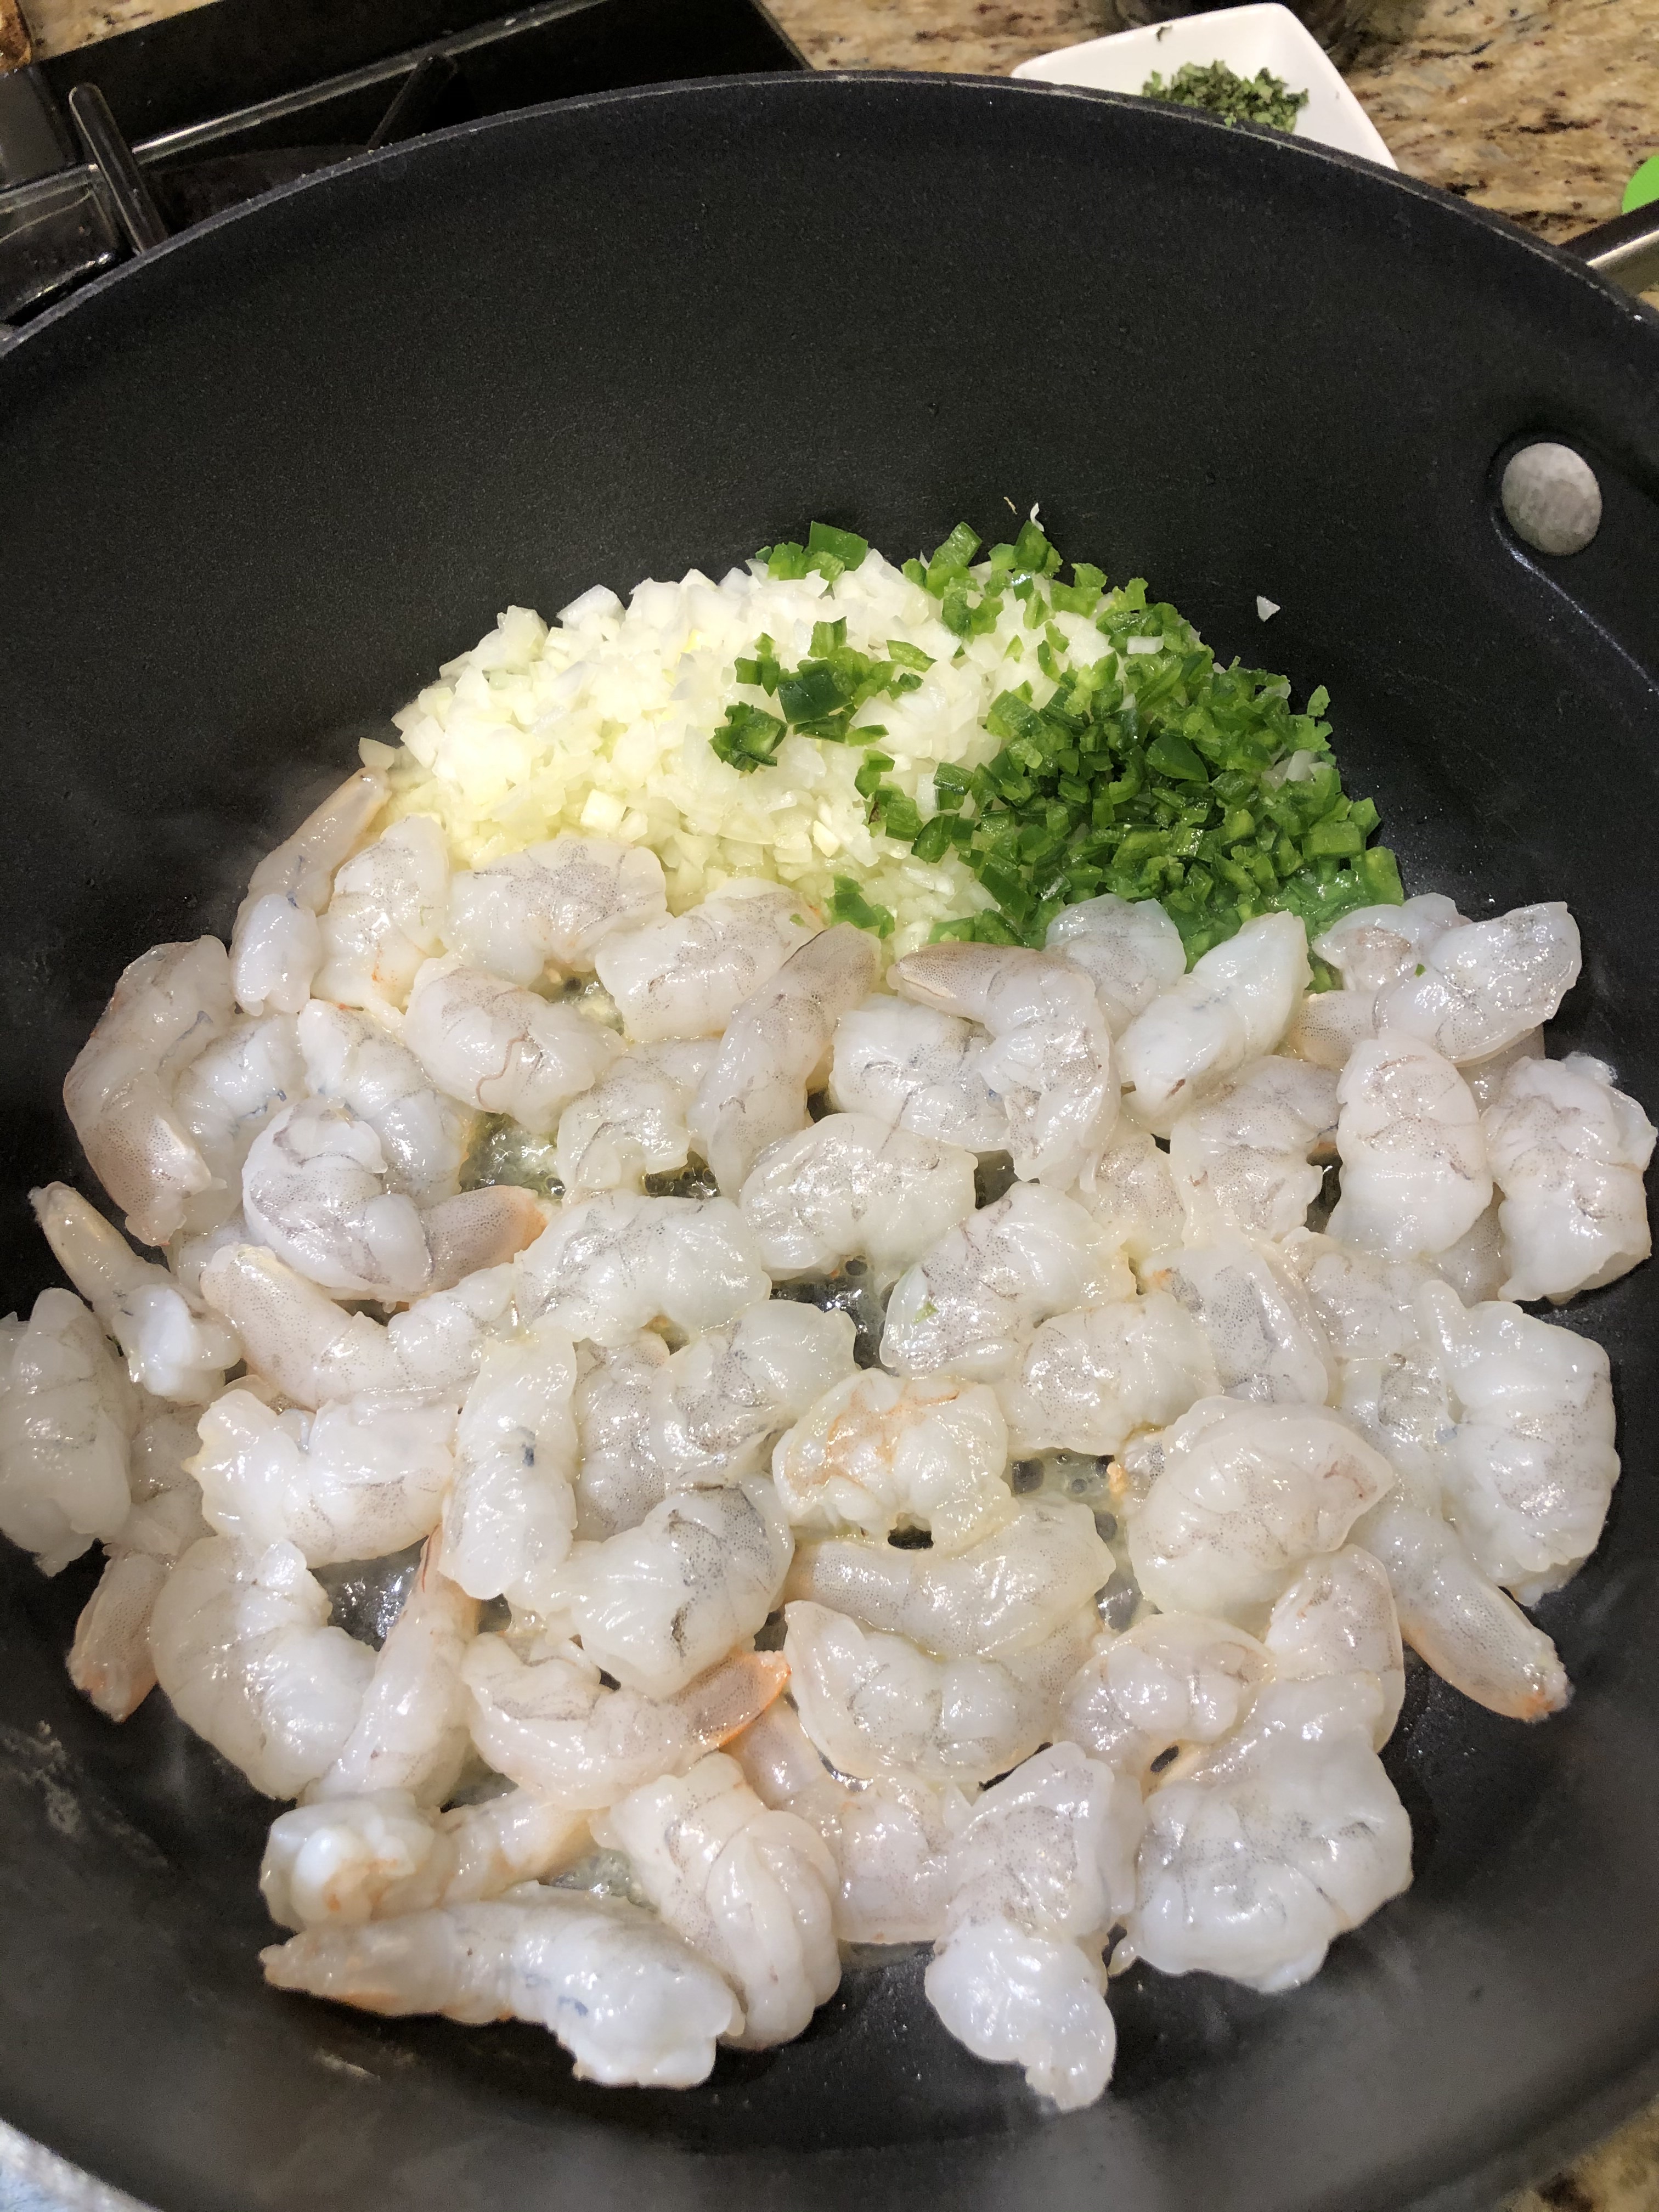
Sauté, stirring constantly for about 5 minutes or until shrimp just turn pink.

    Remove shrimp.

    Add tomatoes, oregano, basil, capers, salt, and pepper. Cook, uncovered for 5-7 minutes.

    Add in capellini, shrimp, and parsley (and pasta water, if needed); toss until mixture is well coated….

    Transfer to serving dish and sprinkle with black olives and Parmesan.

    Serve with a small garden salad and toasted sourdough bread spread with ghee.

    Bottom Line: This has always been one of my favorite dishes for Jeff to make for me and it’s so nostalgic when I eat it. I love the changes he has made and by incorporating the whole grain organic pasta, it fits right into my new diet plan. I also loved that he took pictures of all the steps while he cooked so I could share it with you later. He even cleaned up the kitchen! It was a GREAT day!

    I woke up very excited today because my granddaughters were coming to visit and spend the night. Needless to say, a two and three year old is not usually overly interested in a plant-based diet (at least not these two..ha, ha). So, I was faced with my first real test….cooking something I used to eat for them and not take a bite!

    I had a hearty lunch today with my leftover vegetable soup and a half of a veggie sandwich on whole wheat, so I was pretty full when it came time for the girls to eat. I was trying to make dinner as healthy for them as possible (while still getting them to eat something). That being said, I went with the healthiest chicken nugget option I could find and decided on “Purdue freshly prepared chicken breasts nuggets”. Are they healthy? No. Are they better than most of the other options? Maybe a little.

    I air-fried them in my air fryer to reheat and served them with some broccoli and a little of my healthy cheese sauce I made the other day. It went over pretty well but I was hoping that they would take a couple of bites of the main event later in the evening…Butter Garlic Herb Salmon Foil Packs.

    I actually made these a few weeks ago, just before the New Year, when we were camping. It was a rare December weekend with temps in the high 60’s..perfect for foil packaged dinners. Our camper has an oven so that’s how we prepared them even though they could be done over a campfire, as well. At the time, I was still eating white rice so that is what I served it with. I’m telling you that because I forgot to take pictures last night of my salmon served with brown rice so my picture of the recipe is from a couple of weeks ago. It was just as delicious the second time around!

    Butter Garlic Herb Salmon Foil Packs

    Ingredients

    • 4 6 ounce salmon filets
    • 1 bunch asparagus chopped into thirds
    • 1 red pepper chopped into 1 inch pieces
    • 1 zucchini sliced
    • 1 yellow squash sliced
    • salt and pepper

    Garlic Herb Butter:

    • ½ cup butter room temperature
    • ¼ cup freshly chopped parsley
    • 4 garlic cloves minced
    • 1 teaspoon fresh rosemary chopped
    • 1 teaspoon fresh thyme chopped
    • ½ teaspoon salt
    • ¼ teaspoon pepper

    Instructions

    1. Place four 18×12-inch pieces of heavy aluminum foil on counter. Place the salmon fillets in the center and evenly place vegetable mixture on each piece of foil.
    2. To make the garlic herb butter: In a small bowl add the butter, parsley, garlic, rosemary, thyme, salt and pepper. Divide evenly and place on top of the salmon. Double fold top and ends of each piece of foil, leaving space for steam to gather.
    3. Place packets on the grill and cover. Grill or bake at 400 degrees for 15-20 minutes or until salmon is cooked through and veggies are tender.

    4. Let stand in foil packets for 5 minutes before opening so steam can cook it the rest of the way. Carefully open packets and serve.

    When serving, make sure you save some of that delicious juice to pour over rice. Reminder: Last night I served with brown rice.

    Bottom Line: To be completely honest, I never really liked salmon until i tried this recipe. Now, I more ope. To trying it different ways but I think this recipe will always be my go-to and will stay in my monthly fish rotation.

    Breakfast is the most important meal of the day, right? Lucky for me, maybe not! It turns out that by me skipping breakfast and not eating after 8 pm, I am doing what is called intermittent fasting which apparently is very healthy for you!

    “Studies show that intermittent fasting can: Stabilize blood sugar levels, increase resistance to stress, and suppress inflammation. Decrease blood pressure and cholesterol levels, and improve resting heart rate, brain health and memory.WebMd, December 2019. So now, I don’t feel so bad about not eating breakfast after all!

    Anyway, today was one of those days where I just was not in the mood to cook. It’s rare but it does happen! For lunch I warmed up a cup of my veggies soup and made this incredible salad with oil and vinegar dressing.

    Snack time was taste-testing a healthy layered Mediterranean Dip for the cooking segment I’m doing Monday for one of our local tv stations. It was sooo good and will be perfect to have while watching the national championship on Monday night. Go LSU! Stay tuned for the recipe later this weekend

    Remember those days when all you really wanted to do was come home, relax and order a pizza? Are those days over because you are on a primary plant-based diet? Not even close! Jeff and I ordered from Mellow Mushroom pizza and who knew that a healthy pizza could be so good! We got an artichoke, tomato, black olive, and mozzarella on whole wheat gluten-free crust, It was a winner!

    Bottom Line: There wasn’t much happening in the kitchen today but that just goes to show you that you don’t have to cook all the time to eat healthy. Tomorrow, I will be back in the kitchen for an amazing salmon recipe!

    One of my strategies for making this a successful journey is utilizing leftovers and trying not to waste food. That is what motivated me on Day 7 to finally make breakfast! Not only that, I even made a nutritional snack! I was quite proud of myself!

    The other day I had made Mexican tofu crumbles for some tasty tofu tacos. I had some extra of this as well as the black beans I served as a side so why not throw in some eggs and have a Mexican scramble?! To start, I used clarified butter to scramble two eggs. Although, I am allowing dairy into my diet, I do want to limit it, so by clarifying the butter, you eliminate most of the milk fat. Its actually much healthier for you. I reheated about 1/4 cup of the tofu and a couple of tablespoons of black beans and piled them on top of the eggs along with some chopped tomato. Voila! Leftovers helped me create a very in healthy breakfast in less than 5 minutes,

    Since, I had breakfast, I wasn’t super hungry for lunch so I started to prepare a vegetable soup for dinner so it could simmer on the stove for several hours. During my soup prep, I peeled a russet potato and was just about to throw the peels away, when I thought why not air fry them? I got an air fryer in November and it’s super easy to use. I dried the potato peels on some paper towels then in a bowl, sprayed them with a little olive oil and tossed them with salt. It only took 6 minutes to air fry them on 400 degrees! There were the perfect crisp bite and I will start saving those peels from now on!

    Now back to my soup…

    I LOVE soup! However, I’m not a huge fan of creamy soups so most of my soups are made with a tomato base. Normally, my favorite soup is hamburger vegetable using either beef or turkey but this was going to be vegetarian all the way. I also used to use V-8 juice but too many preservatives for me so I went with organic tomato water. I love that it can be made early in the day and simmer on the stove for hours..such a comforting smell.

    Tomato Vegetable Soup

    Ingredients

    • 1 tbsp olive oil
    • 1 onion, chopped
    • 1 jalapeño, chopped (optional but the heat improves metabolism)
    • 1 large carrot, peeled and chopped
    • 1 russet potato, peeled and chopped into uniform pieces
    • 2 cups Savoy cabbage, chopped
    • 2 cups water (more if you like a brothier soup)
    • 2 cups organic tomato juice
    • 1 can lima beans, rinsed and drained
    • 1 can white corn, rinsed and drained
    • 1 can diced tomatoes with juice
    • 1 tsp onion powder
    • 1 tsp garlic powder
    • 1 tbsp soy sauce
    • 1 tbsp hot sauce
    • 1 tsp red pepper flakes
    • 2 tbsp dried parsley
    • Salt and pepper to taste

    Directions

    Sauté the onions and jalapeño in the olive for for 2-3 minutes. Add in the carrots and a couple of tablespoons of water and sauté for about 10 minutes, adding water when needed to keep from burning (This adds in cooking the carrots most of the way through so you retain more of the vitamins in the cooking process).

    Add the water, tomato juice, potatoes, and cabbage; bring to a boil and keep on a medium simmer until potatoes are almost cooked through.

    Add the remaining ingredients and simmer on low for at least 30 minutes (the longer the better).

    I served mine with a slice of toasted sourdough bread..yum!

    Bottom Line: This soup is delicious in its simplicity of vegetables and natural ingredients. As with most soups, it even better the next day but you may need to add a little water since the veggies will absorb some of the water during cooling. Swap out the veggies for your favorites and enjoy with your favorite sandwich!

    “Food is our common ground, a universal experience..” James Beard. This quote certainly held true today when during lunch with one of my best friends, Jenny, and then again, while getting my toes manicured with Amy, the subject of food played a major part in the conversation. Food is something we all can talk about…it encourages comparing and sharing of that “common ground”.

    As usual, I skipped breakfast today and just had my coffee but for good reason this time. I was meeting Jenny for lunch at First Watch Cafe. We discussed our current diet plans…she is trying out WW and so far is being pretty successful. I got to share all about my new plant-based diet and it was so much fun sharing what we loved about our choices. I definitely believe including your friends in your path to health really helps improve the experience.

    It took me a while to decide what to get because while there are so many healthy choices, so much of it is extremely high in calories. I ended up going with the Market Vegetable Sandwich and the Vegetable Soup. It was wonderful and filled with delicious veggies like spinach, mushrooms, and zucchini on the most tasty grilled artisan whole grain bread. I couldn’t eat the 2nd half of my sandwich but I took it home and did finish it later. I’m going to work on creating an even healthier version of this at home.

    After lunch, I went to see my favorite manicurist, Amy, for a mani/pedi. I’ve been going to Amy ever since she did my nails for my first tv cooking segment for a local station over 4 years ago. Naturally, we talk a lot about food when I go since she knows that my nails will be seen while doing the segments. Amy is from Vietnam and loves to cook with her mother. In fact, the last time I was there, we discussed how her mother makes authentic pork egg rolls and she offered to bring some to me on my next appointment. Since, I’m now not eating meat, I texted her about that beforehand and she offered to make half of them pork and half shrimp..I was so excited! After a wonderfully relaxing massage of my legs and toes, she gave me 30 perfect little egg rolls! Of course, now dinner had to be all about those so here comes stir fry!

    Obviously, my “indulgence” for dinner was going to be those egg rolls even though I was cooking them in the air fryer. Therefore, my stir fry needed to be light and the place where stir fry can go down hill is in the sauce. Typically, stir fry sauce has cornstarch is in it. I researched substitutes and came across arrowroot powder but did find that if it was cooked too long, it can become bitter. So, I swapped it with whole grain rice flour and it was the perfect substitution.

    I decided on a shrimp stir fry and chose just a few of my favorite veggies to keep it simple.

    Healthy Shrimp Stir Fry

    Ingredients

    Sauce

    • 1/3 cup low sodium soy sauce
    • 1/4 cup sesame oil
    • 1 tbsp whole grain brown rice flour
    • 1 tsp minced garlic
    • 1 tsp minced fresh ginger

    Combine all ingredients and whisk until smooth.

    Shrimp Stir Fry

    • 1 tbsp olive oil
    • 1 lb shrimp, peeled, deveined, and washed
    • 1 red bell pepper, julienned
    • 3 oz mung bean sprouts
    • 2 bunches baby boy Choy
    • 1/2 cup shiitake mushrooms, washed

    Directions

    Prepare sauce and let stand while you prep shrimp.

    In a small bowl, mix 2 tablespoons of sauce and mix with shrimp.

    Heat 1 tbsp olive oil in a pan and sauté shrimp for about 3-4 minutes; you want them slightly undercooked.

    Remove shrimp from pan, leaving excess oil and sauce, and sauté red bell pepper for 2-3 minutes until slightly soft.

    Add in bean sprouts and sauté an additional 2-3 minutes.

    Add in bok choy, mushrooms, and desired amount of sauce. Note: I start with a couple of tablespoons at a time because I don’t want the sauce to overwhelm the veggies and the amount of sauce you use, will depend on the quantity of your veggies.

    After about 5 minutes, add the shrimp back in to finish cooking (about 3 minutes). At this point you will want to add in any additional sauce you want depending on how saucy you like it.

    Serve over brown rice (topped with a little of that pan sauce) and if you are lucky, a homemade air -fried egg roll!

    Bottom Line: This was so light yet hearty and it left me completely satisfied after dinner. It’s so easy to switch our your favorite veggies or even add more veggies and leave out the shrimp completely. I will be making this again and again! Thank you, Amy, for helping to make our meal extra special!

    Following a plant-based diet can be difficult if you have a meat-loving spouse.  Yes, I like meat but Jeff LOVES meat!  He is, however, willing to be somewhat helpful in my journey in that he is willing “to try” what I make and will find a way to add to his meals so I don’t have to cook two separate meals.  But, on Day 5, I decided to try Tofu Tacos and that might be a little too much on his first day home from his trip so we made a compromise…isn’t that what good marriages are all about?  I made him ground pork tacos as long as he would eat one of my tofu tacos. We had a deal!

    First, let’s focus on what I ate before we get to dinner.  I must admit I slept in yesterday.  It was a Sunday morning and I was in no hurry to get moving.  So I just snuggled up next to the fireplace with my blanket. my dog, Oscar, and worked on my blog while sipping coffee. I finally got around to eating a banana later in the morning. Lunch was just a salad with tomatoes, feta cheese, gherkin dill pickles, feta cheese and a splash of oil & red wine vinegar…nothing exciting but still hit the spot.

    Snacks were my daily go-tos of pistachios, apple chips, and one truly incredible treat…2 bite size sea salt chocolate caramels! YUM!

    Now for the tofu recipe…tofu can be super wet so I bake it first in the seasonings to help it dry out to avoid having to include traditional flours or cornstarch to dry it out.  I’m trying to stay away from white flour and cornstarch is too processed. This trick worked perfEctly and the tofu was the perfect consistency.

    Vegetarian Spicy Tofu Tacos

    Ingredients

    • 1/4 cup onion, diced
    • 1 jalapeno, diced
    • 3 tablespoons light oil, divided into 1 tbsp and 2 tbsps
    • 2 tablespoons soy sauce
    • 1 tablespoon apple cider vinegar
    • 1 tablespoon chili powder
    • 2 teaspoons smoked paprika
    • 1 teaspoon garlic powder
    • 1 teaspoons oregano
    • 1/2 teaspoon black pepper
    • 1/4 teaspoon ground cumin
    • 1/4 teaspoon ground coriander
    • 1/8 teaspoon ground cloves
    • 1 block (350g) extra-firm tofu, crumbled
    • 1 cup fresh salsa
    • 2 tablespoons hot sauce
    • 4 whole wheat tortillas

    Suggested toppings:  salsa, avocado, tomatoes, onions, cilantro, etc…

    Directions

    Preheat your oven to 350F (180C). Line a large baking sheet with parchment paper or lightly grease it. (Tip:  I put a little oil or cooking spray on the pan if I’m using parchment paper to help it stick to the pan and stay down)

    Saute onion and jalapeno in 1 tbsp olive oil (Tip:  if my onion mixture starts to dry out before they are fully cooked, I just add a splash of water)

    Mix the oil, soy sauce, vinegar and all of the spices together in a large bowl.

    Drain the tofu in a colander and crumble with your fingers.

    Mix the tofu crumbles with the seasoning making sure all of the tofu is evenly coated. Spread the tofu crumbles evenly over the prepared pan. Bake for 25 to 30 minutes, stirring every 5-10 minutes/

    Add to a sauce pan with the salsa and hot sauce to heat through.  Allow to simmer for about 15 minutes.

    Serve on warmed tortillas with desired toppings; I like to serve black beans on the side.

    Bottom Line:  I really enjoyed these and they will be included in my dinner rotation! Even Jeff ate the one he was require to eat without too much of a fuss.  I think adding a fruit salsa would definitely kick it up a notch with the addition of more citrus.  Try this in your kitchen and let me know what your think!


    Simple is Sustainable…and that is exactly what Day 4 was for me. It was all about leftovers and a simple dinner with no cooking involved. It was Saturday and my husband was currently out of town. So, it was just me, Lily and Mylo (my feline friends) and my best cuddle buddy, Oscar, my little shitzu. Pretty good company, for sure.

    I woke up yesterday morning feeling so refreshed and truly surprised that I had just completed three full days without meat and truly wasn’t craving it. My husband, Jeff was gone for just one more day and I thought it was a perfect day to show that this could be a successful eating plan without even turning on the stove!

    If you have been following along with me so far, you probably already know how I started my day, coffee and my Mean Green Juice. Note: I will have to change it up tomorrow because I’m out of the juice!

    Lunch is usually my favorite meal of the day because it’s usually leftovers. Some people don’t care for eating the same thing two days in a row, but it’s right up my alley.

    I had some Ikarian Winter Potato Salad from last night so I set the potatoes removed them from the fridge and let out so they could come to room temperature. Next, I tossed my salad with the leftover dressing. I mixed it all together about 20 minutes later.

    This was even better the next day!

    Then, I warmed up a cup of Progresso Lentil Soup to go along with it…this probably wasn’t the best choice because of the salt content and it is considered highly processed but, I am trying to eat some of the foods I already have in my pantry and did need the protein. Again, this is a journey and this was way better of a choice than I would have made a week ago. Baby steps…

    My snacks included carrots and hummus, a serving of pistachios, and some Bare Apple Chips.

    These are soooooo good!

    Finally, it was time for dinner and I wanted to stay with my super simple day so I thought a poke bowl might be the ticket. The term “poke” is a Hawaiian term for cutting or slicing and is usually associated with raw fish. I had some sashimi grade Tuna, Mung bean sprouts, and a little leftover steamed brown rice. This is what I came up with…

    Tuna and Bean Sprout Poke Bowl – 1 serving

    Ingredients

    • 2 oz mung bean sprouts
    • 2 tbsp sliced scallions, chopped at an angle
    • 1 tbsp fresh lemon juice
    • 4 oz sashimi grade tuna
    • 1/4 cup soy sauce
    • 1 tsp sriracha (omit this if you don’t like spicy heat)
    • 1 tbsp fresh lime juice
    • 1 tsp fresh grated ginger
    • 1 tbsp roasted sesame seeds
    • 1 cup cooked brown rice

    Directions

    • In a small bow, mix the sprouts, scallions, and lemon juice; let stand at room temperature for one hour
    • In medium bowl, mix the tuna, soy sauce, sriracha, lime, juice, ginger, and sesame seeds
    • Toss the sprout mixture and tuna mixture together
    • To serve, put the rice in a small bowl and top with the sprout/tuna mixture

    I really loved the fresh flavors of this simple dish but, in hindsight, this would have been way better with some avocado and maybe some fresh mango.  Oh, well…next time.

    Bottom Line:  Simple is best on days like today when you just don’t feel like getting in the kitchen. I spend quite a bit of my relaxing time menu-planning for the week to come so stay with me because tonight I’m going to try tofu tacos!  Talk to you tomorrow!


    “You are what you eat, so don’t be fast, cheap, easy, or fake.” -Unknown

    This quote, while quite humorous, is so accurate and already on Day 2, I’m learning so much about how what we eat impacts our health. Yes, I’m finding that it does take a little more time and that is why leftovers and a sandwich was part of my meal plan today. Simple, fast, but very satisfying.

    I was in a hurry this morning so after my morning coffee (I have always taken it black, so cream is not a problem there), I stopped at the I Love Juice Bar and got 2 (one for today and one for tomorrow) Mean Greens Juice”…my favorite juice with such a spicy kick that satisfies and warms my body. This is information is from their website, https://ilovejuicebar.com/juicebarblog/meetthegreens to tell you exactly what is in it and the health benefits.

    I ended up only drinking 3/4 of my first large serving so I should have enough left to enjoy for 2 more days. You have to think ahead for this journey to be successful.

    For lunch, I took the leftover route with a cup of leftover Ikarian Longevity Soup (see yesterday’s post for my version). It actually was even better the second day!

    Throughout the day, I had two snacks, a green apple, a serving of pistachios, and a slice of pepper jack cheese. As I said, I’m still allowing a little fish, eggs and dairy.

    Interesting note, but did you know that apples are considered one of the best superfoods in that it is already in a standard portion size, you can eat it on the go, it gives you the sweetness you might be missing from all that processed sugar and if you leave the skin on, it reduces cholesterol!

    Pistachios are known for being heart-healthy and an anti-inflammatory. However, since they contain so many antioxidants, they naturally prevent some of the signs of aging. Notice that word “naturally”…How many people do you know that each such a healthy diet but actually put a bacteria that comes from botulism in their skin! I just don’t get it, but to each their own. More pistachios for me!

    Finally, my dinner was a sandwich but not just any sandwich. I started off with a whole grain bread which is a great source of fiber and protein and helps give you that full feeling to prevent overeating. Next, I spread some hummus on both sides of my bread, then topped with thinly sliced cucumbers, clover sprouts, tomato, and avocado.

    The result..a beautiful colorful sandwich packed with nutrients!

    So, I said I would share the good stuff but the missteps as well. I did have a chocolate craving so I did indulge in 2 mini snack size snickers. No regrets..this is a daily step-by-step and it isn’t the worst choice I could have made. 🙂

    I keep up with my calories and nutrients on an app called MyFitnessPal and it indicted that I was a little under in calories for the day even with my little candy bar “hiccup”. I need to work on upping the calories just a little so I don’t one day fall off the wagon because I don’t have enough energy. However, allin all day 2 went pretty well and other than that small hiccup, I never felt hungry.

    New Year’s Day is typically considered a day in which we focus on the positive changes we want to make for the new year. This seems especially true when we embark on a new decade that offers so many possibilities. At 53 years old, I realize more and more the value of how food impacts my health and I want to take this time to reset how I eat. So, I hope you will join me on my January journey towards a cleaner way of eating. My goals this month are:

    • Eliminating beef, pork and chicken
    • Reducing the amount of processed foods
    • Focus on more plant-based foods

    As I mentioned in my post yesterday, I’m going to focus first on foods from what is called the Blue Zones of our world. These are places where people live to be 100+ but are healthy and food plays a very large part in this. There are 5 of these zones and my first stop will be will be in Ikaria, Greece.

    “THE IKARIAN DIET, like that found on many other Mediterranean islands, includes a generous dose of vegetables and olive oil as well as lower amounts of dairy and meat products. It is a remote place, however, and the local diet is unique from other Greek and nearby islands because of its focus on beans and legumes (especially chickpeas and lentils), wild greens, goat’s milk, and smaller amounts of fish.”

    Excerpt From The Blue Zones Kitchen, Dan Beuttner

    https://books.apple.com/us/book/the-blue-zones-kitchen/id1448123657

    So here is how my Day 1 went….

    I rarely eat breakfast so really I just started my day with coffee. I snacked on some dried apple chips and has a little Swiss cheese but really didn’t have more than that. What I did do is make a version of Ikarian Longevity Stew which has black-eyed peas in it which are often a symbol of good luck for the new year. I added my own twist of putting in some carrots and another traditional new year’s ingredient, collard greens, plus some jalapeño and other heat seasonings. I love my spice! Here is my version:

    Ikarian Longevity Soup

    INGREDIENTS

    • ½ cup extra-virgin olive oil, divided
    • 1 large onion, finely chopped
    • 4 garlic cloves, finely chopped
    • 1  fennel bulb, cored and chopped
    • 1 jalapeño, seeded and chopped
    • 1 carrot, peeled and chopped
    • 15 oz can black-eyed peas, rinsed and drained
    • 1 32 oz can diced tomatoes, with juice
    • 2 tsp tomato paste, diluted in ¼ cup water
    • 2 cups collard greens, chopped
    • 1 cup water
    • 2 tablespoons hot sauce
    • 1 tbsp red pepper flakes
    • 1 tsp onion powder
    • 2 bay leaves
    • Salt to taste
    • 1 bunch  dill, finely chopped

    DIRECTIONS

    1. Heat ¼ cup oil over medium heat. Add onion, fennel, carrots, and jalapeño; cook, stirring occasionally, until soft, about 12 minutes.

    2. Add in tomato paste and “toast” with veggies for 1 minute

    3. Add tomatoes and peas plus enough water to cover the beans by about 1 inch.

    4. Add in collard greens, bay leaves and other seasonings.

    5. Bring to a boil, reduce heat and simmer 40 minutes.

    6. Add dill and season with salt.Remove from heat, and stir in remaining ¼ cup olive

    My finished product along with a side of sourdough bread and a sprinkle of fresh Parmesan cheese to garnish

    Sourdough bread on a mainly plant based diet? Yes! Apparently, the fermentation makes it a healthy choice so you aren’t just limited to whole grain bread. This was the perfect compliment to my soup and gave it that “chew factor” you sometimes miss with soup.

    Bottom Line: this soup is so versatile and you can easily switch out the veggies for your favorites! For leftovers, I plan on this over brown rice and omit the bread. Give this a try and let me know what kind of personal twist you put on it.

    Being a huge foodie, I’m always on the lookout for the latest food trends and it’s hard to ignore the recent trend towards a more plant-based diet. I did do a Pescatarian Diet about 7 years ago and truly never felt better. Basically, that is eliminating all meat such as beef, pork, and poultry but still allowing fish, eggs, and dairy. I loved it! The problem was that I was a personal chef at the time and it’s hard to test recipes and meet your client’s needs, not tasting your food. So, after 3 months, I gave it up.

    I have always loved vegetables but growing up in the South, the protein was always the focus of the meal. A typical dinner included a meat with a starch and a vegetable and yes, a slice of some kind of bread. Even in recent health trends, the protein was still the focus and foods like rice and potatoes were considered “bad”. Red meat and bacon were supposed to be “good for you”..just don’t eat those carbs!

    But, let’s not put all the blame on the protein. The amount of processed food we eat continues to grow year after year. Part of it is convenience, of course, but let’s face it, most if it is because we are addicted to salt and sugar. As obesity rates climb, we have simply forgotten what whole foods taste like. Fortunately, the current trend is trying to remind us.

    All of this being said, I know that if I tried to move to a completely plant-based diet, it would be an epic failure. Therefore, I’m going back to my Pescatarian lifestyle which will still allow me to have fish and seafood as well as eggs and dairy. But this time, I’m going to put more focus on those whole foods and eliminate all that processed junk!

    So, here is to my January Journey of Pescatarian and Plant-Based eating. I’m going to share my journey along with my recipes and slip-ups. My goal is at the end of this month, the arthritis in my hands will feel a little better, my energy level will increase, and I will have a new appreciation for food.

    My first recipe is adapted from a cookbook called “The Blue Zone Kitchen” and wow, is this a great read! It focuses on the foods that people from 5 zones in our world eat. Why? Because these people typically live to be a 100 or over yet have fewer illnesses and more energy than people normally have in their 60’s and 70’s! Yes, some of the zones do have the occasional meat dish but primarily all of the regions are plant based. I’m going to be trying many of these recipes. But the first one is called Ikerian Longevity Soup. I adapted it for the new year and added black-eyed peas and collard greens. It was delicious so stay tuned for tomorrow’s blog when I share this recipe and my Day 1 journey!

    This time of year, there is only one thing on every Tennessee Vol fan’s mind…the big game against the Florida Gators! Every year, my husband fries up some gator and I make some “Comeback Dipping Sauce” to go with it. As delicious as those are, I wanted to try something a little different this year, so I created a new recipe using fresh alligator…Gator Jalapeno Poppers! And yes, with a gator recipe, there must be a dip so that is where the delicious Creole Mustard Dipping Sauce comes in. Yum!

    If you have never tried alligator before, you are in for a treat. It does taste a bit like chicken but with a little tang to it. The tail is usually the most tender, so look for that if you can find it. I purchased mine from the Shrimp Dock in Farragut. (If you stop by, make sure to ask for Steve. He is always so helpful!)

    As usual, my husband, Jeff, was my tester and he gave them rave reviews. Since I was scheduled to be on a cooking segment this week at our local tv station on Florida week, I knew what I was going to make! My new Gator Poppers and let’s just say they wowed the crowd and they will wow crowd, too!

    Gator Jalapeno Poppers

    • 1 pd pckg alligator
    • 1 tbsp hot sauce
    • 1 tbsp olive oil
    • 2 tbsps of Old Bay or Cajun Seasoning (reserve one tablespoon)
    • 1/2
    • 8-oz pckg Cream Cheese , softened (I prefer Onion & Chive)
    • 13-15 slices Bacon, cut in thirds
    • 1/2 cup brown sugar
    • Wooden Toothpicks

    Creole Mustard Dipping Sauce

    • 3/4 cup low fat mayonnaise
    • 1 tbsp yellow mustard
    • 1 tbsp stone ground mustard
    • 1 tsp horseradish
    • 1 tsp apple cider vinegar
    • 1/2 tsp garlic powder
    • 1/2 tsp onion powder
    • salt and pepper to taste


    Directions
     for Gator Poppers

    • Place the gator pieces between two pieces of plastic wrap and pound to a 1/2 thickness. Cut into strips about 1 inch wide and 2-3 inches in length.
    • Combine the olive oil, hot sauce, and 1 tablespoon of the old Bay/Cajun Spice in a medium sized bowl (reserving the other tablespoon of spice for later).
    • Add the gator to the mixture and mix well. Allow to sit at room temperature for 30 minutes.img_0306
    • Preheat the oven to 350 degrees. Line a large baking sheet with foil and Place a baking/cooling rack inside.the baking sheet.
    • Remove the gator from the marinade and place a gator piece on a work surface.img_0312
    • Spread 1 tsp of cream cheese to cover the top.img_0313
    • Place one jalapeno pepper piece in the middle of the cream cheese.img_0316
    • Fold the gator piece in half with the cream cheese inside.
    • Set one 1/3 slice of bacon on the work surface. Place a stuffed gator piece with the ends facing down on the bacon and the open sides facing the bacon NOT outward (this allows the open ends to be covered by the bacon when rolled so the stuffing does not easily leak out when cooked). 
    • Wrap the bacon around the stuffed gator and secure with a toothpick.
    • In a small bowl, mix together remaining tablespoon of Old Bays/Cajun Seasoning and the brown sugar.
    • Dip the gator poppers in the sugar mixture, covering the bacon (this ensures that your bacon will crisp up in the oven).
    • Place on top of baking cooling rack and bake for 30-33 minutes until bacon is crisp.
    • Allow to cool for 5 minutes.
    • Serve with Creole Dipping Sauceimg_0330-1

    Directions for Creole Dipping Sauce

    • Combine all ingredients, mixing well
    • Refrigerate for at least 30 minutes. It can be made up to 3 days ahead.img_0329


    Bottom Line:  This uniquely delicious popper recipe is not only delicious but super easy! If you just can’t stand the idea of alligator, you can use chicken as a substitute but please give the gator I try.  These will go fast so make a lot!

    So we all have heard of “White” Chicken Chili and love all it’s cheesy, rich flavors but it’s the New Year and many of us are focusing on eating healthier. Here is where “Red” Chicken Chili comes in! It a super easy recipe, packed with protein and fiber that will leave you satisfied without all the extra calories and fat.

    The first time I prepared this, I did it on the stove top using a rotisserie chicken. However, you can also make this chili using the Instant Pot without pre-cooking your chicken. The key is to use both white and dark meat chicken for added flavor. If you are using your Instant Pot, you can even use FROZEN chicken! Wow!

    So for your convenience, I have provided directions for all 3 cooking methods. I hope you enjoy it as much as we did!

    Instant Pot Red Chicken Chili

    Ingredients

    • 1 tablespoon of olive oil
    • 1 jalapeño, seeded and chopped
    • 1 large shallot, chopped
    • 1 tablespoon of minced garlic
    • 1 1/2 pounds cooked boneless chicken breasts and thighs, shredded
    • 2 cups chicken broth
    • 2 cups of tomato juice
    • 1 tablespoon hot sauce
    • 14 ounce can pinto beans, drained and rinsed
    • 14 ounce can black beans, drained and rinsed
    • 14 ounce can light red kidney beans
    • 14 ounce can diced tomatoes (with liquid)
    • 4 ounce (127mL) can chopped green chilis
    • 1 cup corn kernels
    • 1 teaspoon salt
    • 1/2 teaspoon pepper
    • 1 teaspoon onion powder
    • 2 teaspoons chili powder
    • 1 teaspoon cumin
    • 1 teaspoon garlic powder
    • 1 teaspoon dried oregano
    • 1 teaspoon red pepper flakes
    • Cilantro, for garnish

    Instructions

    Stove Top

    Sauté jalapeño and shallots in the olive oil until softened (about 5-10 minutes). Add in garlic and sauté an additional 2 minutes.

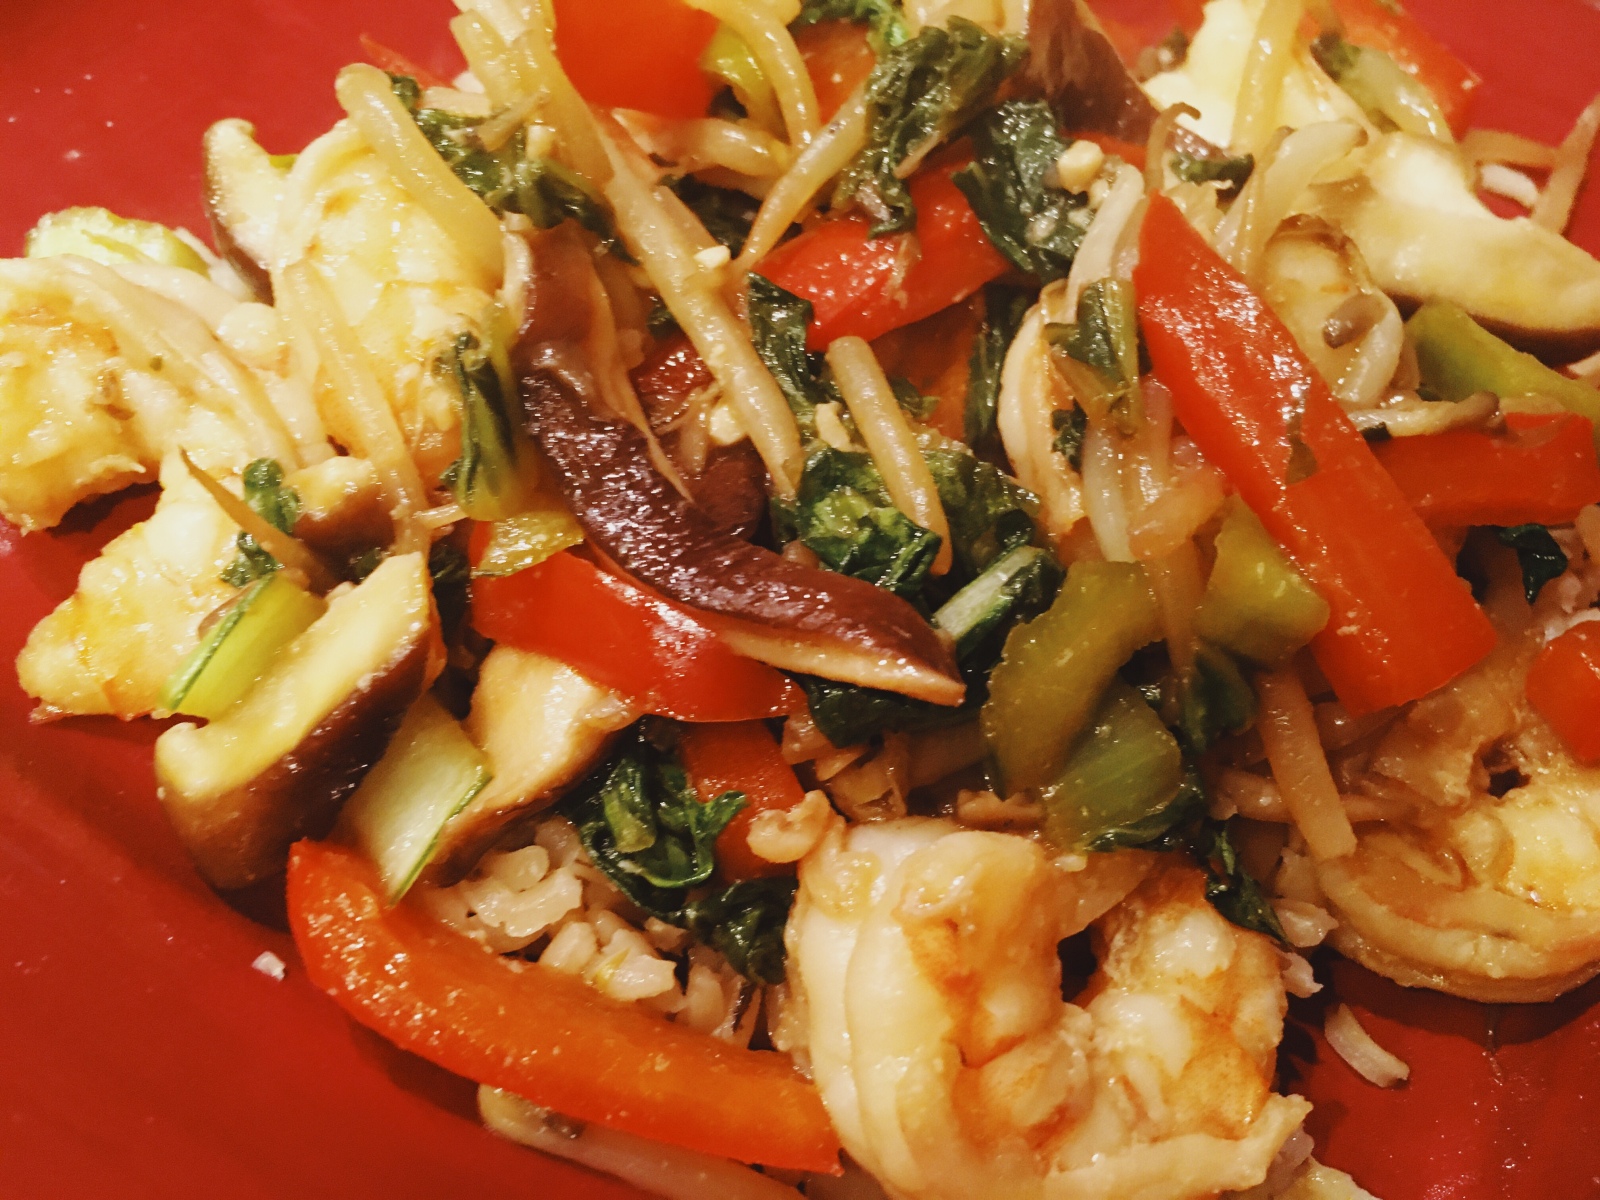
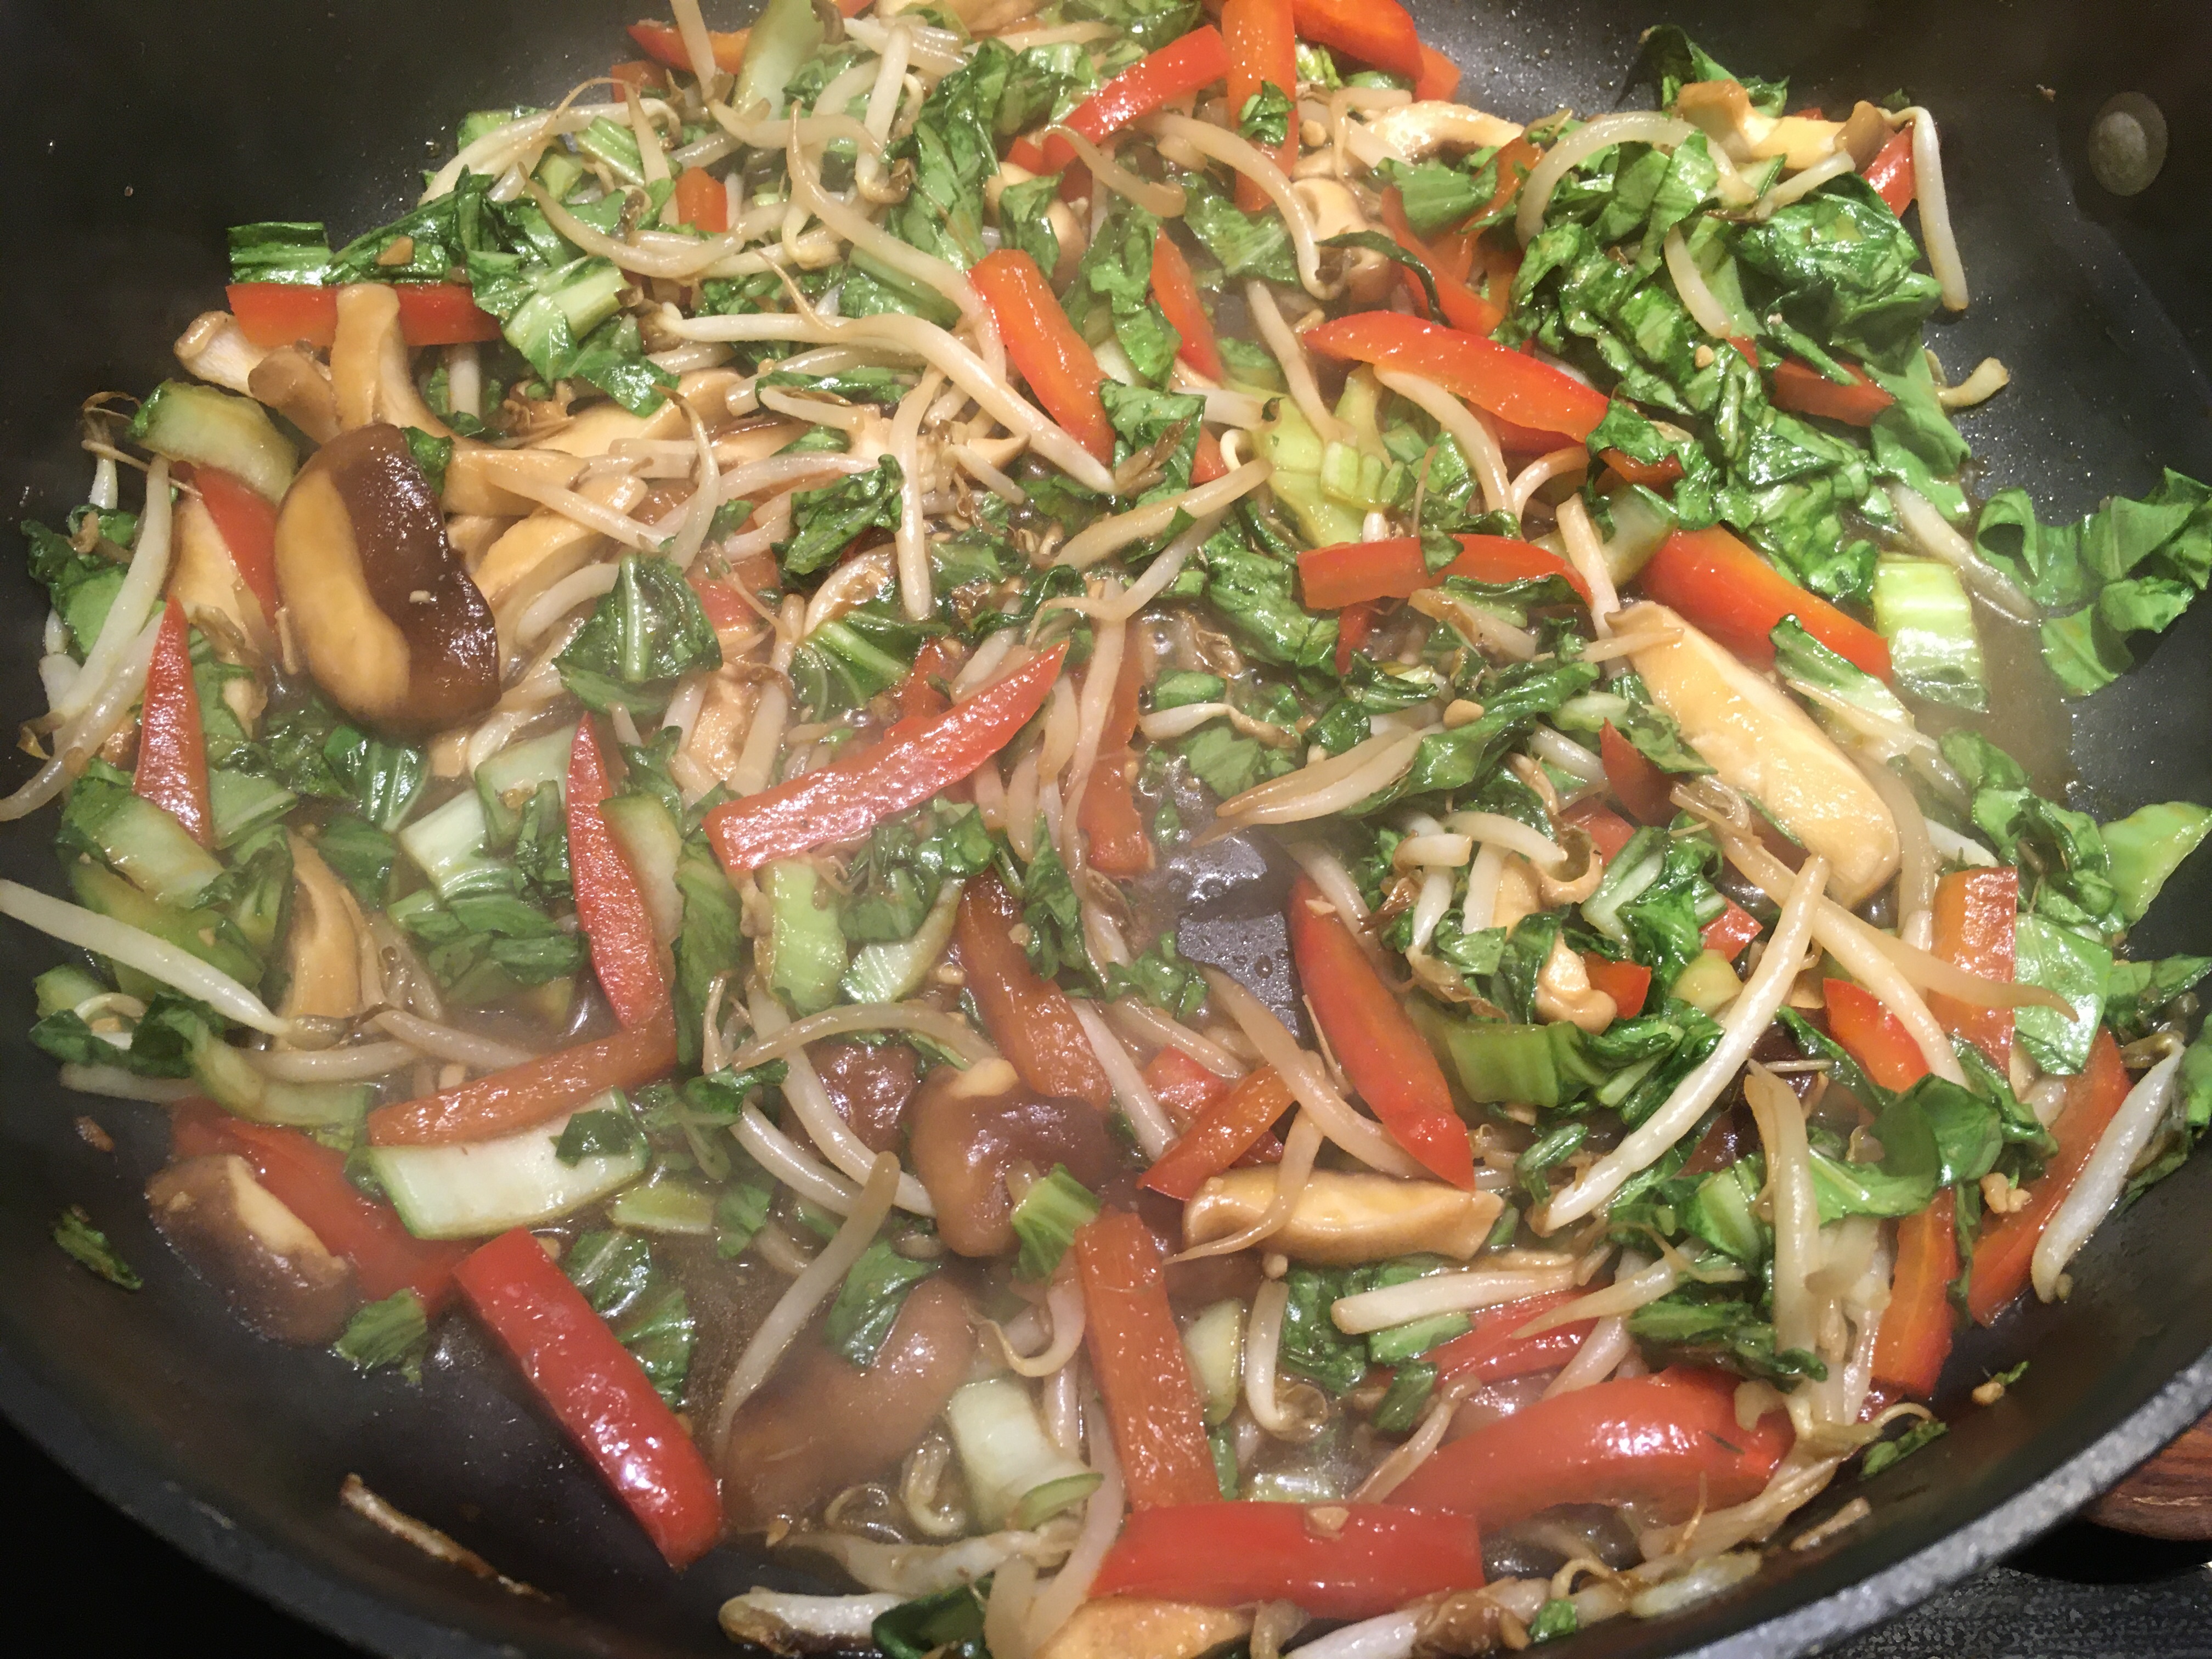
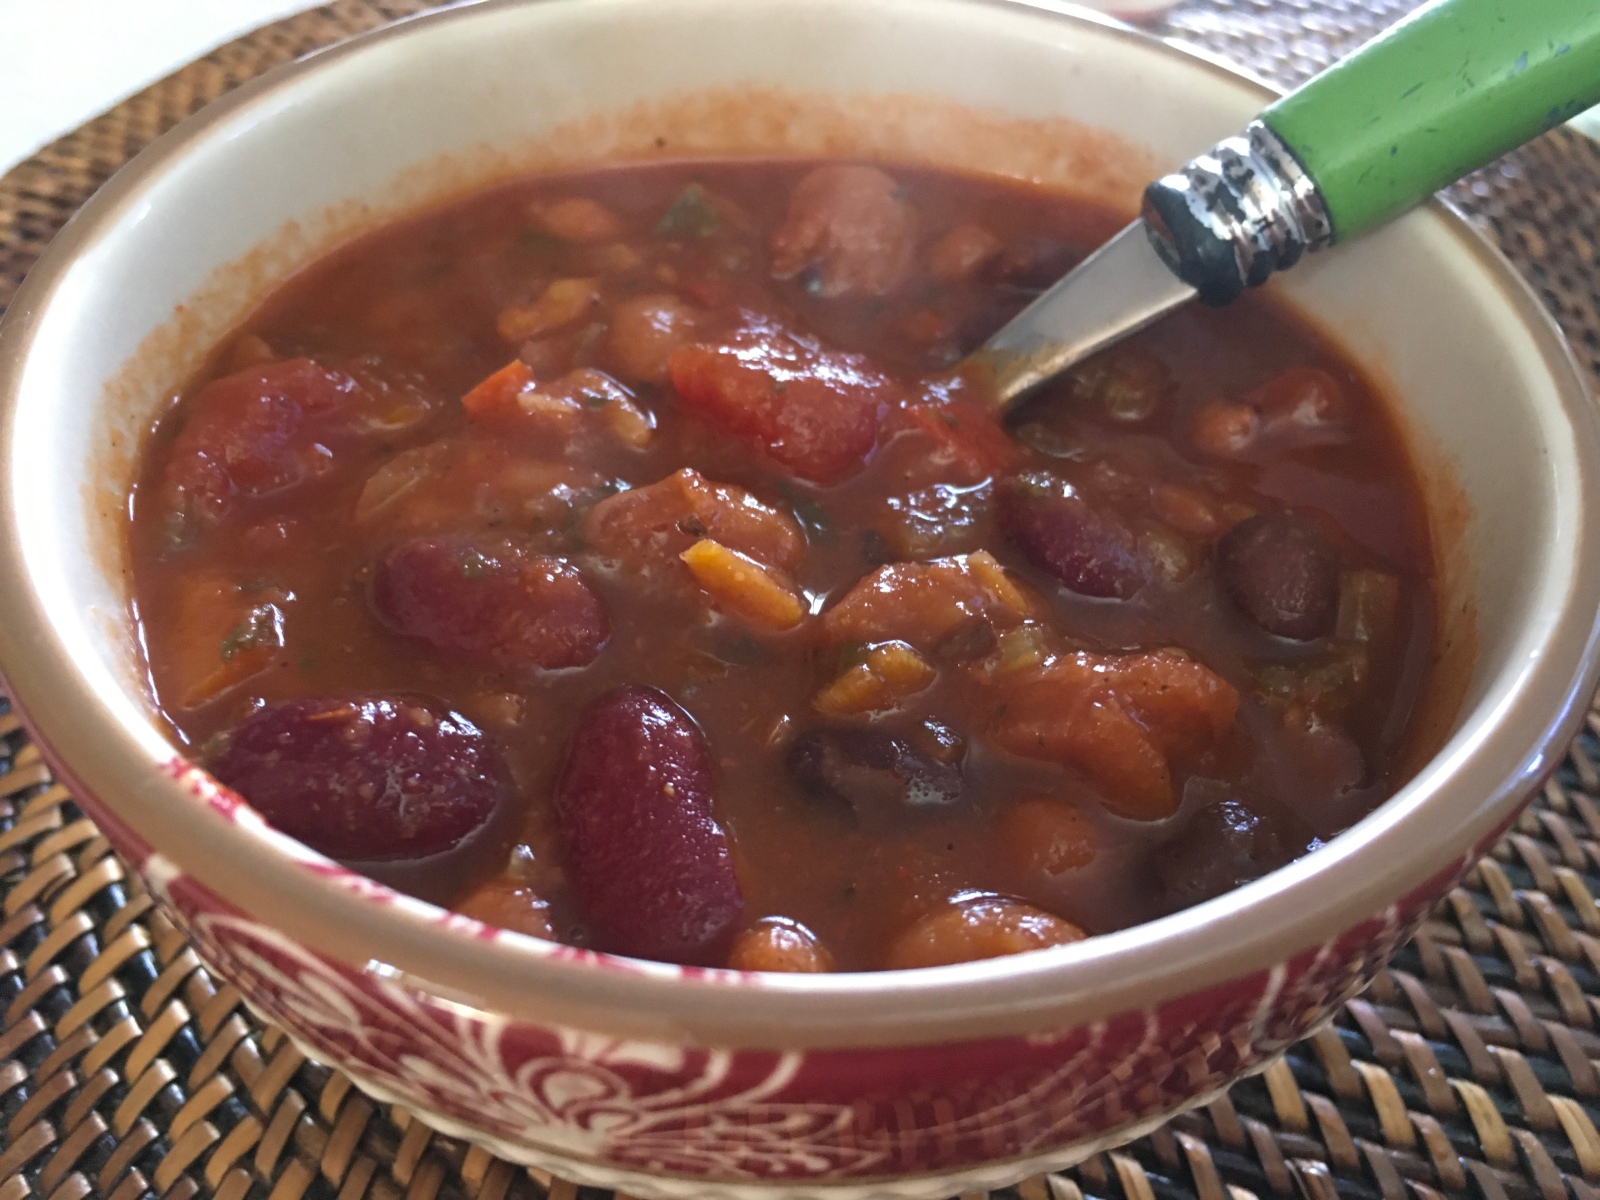
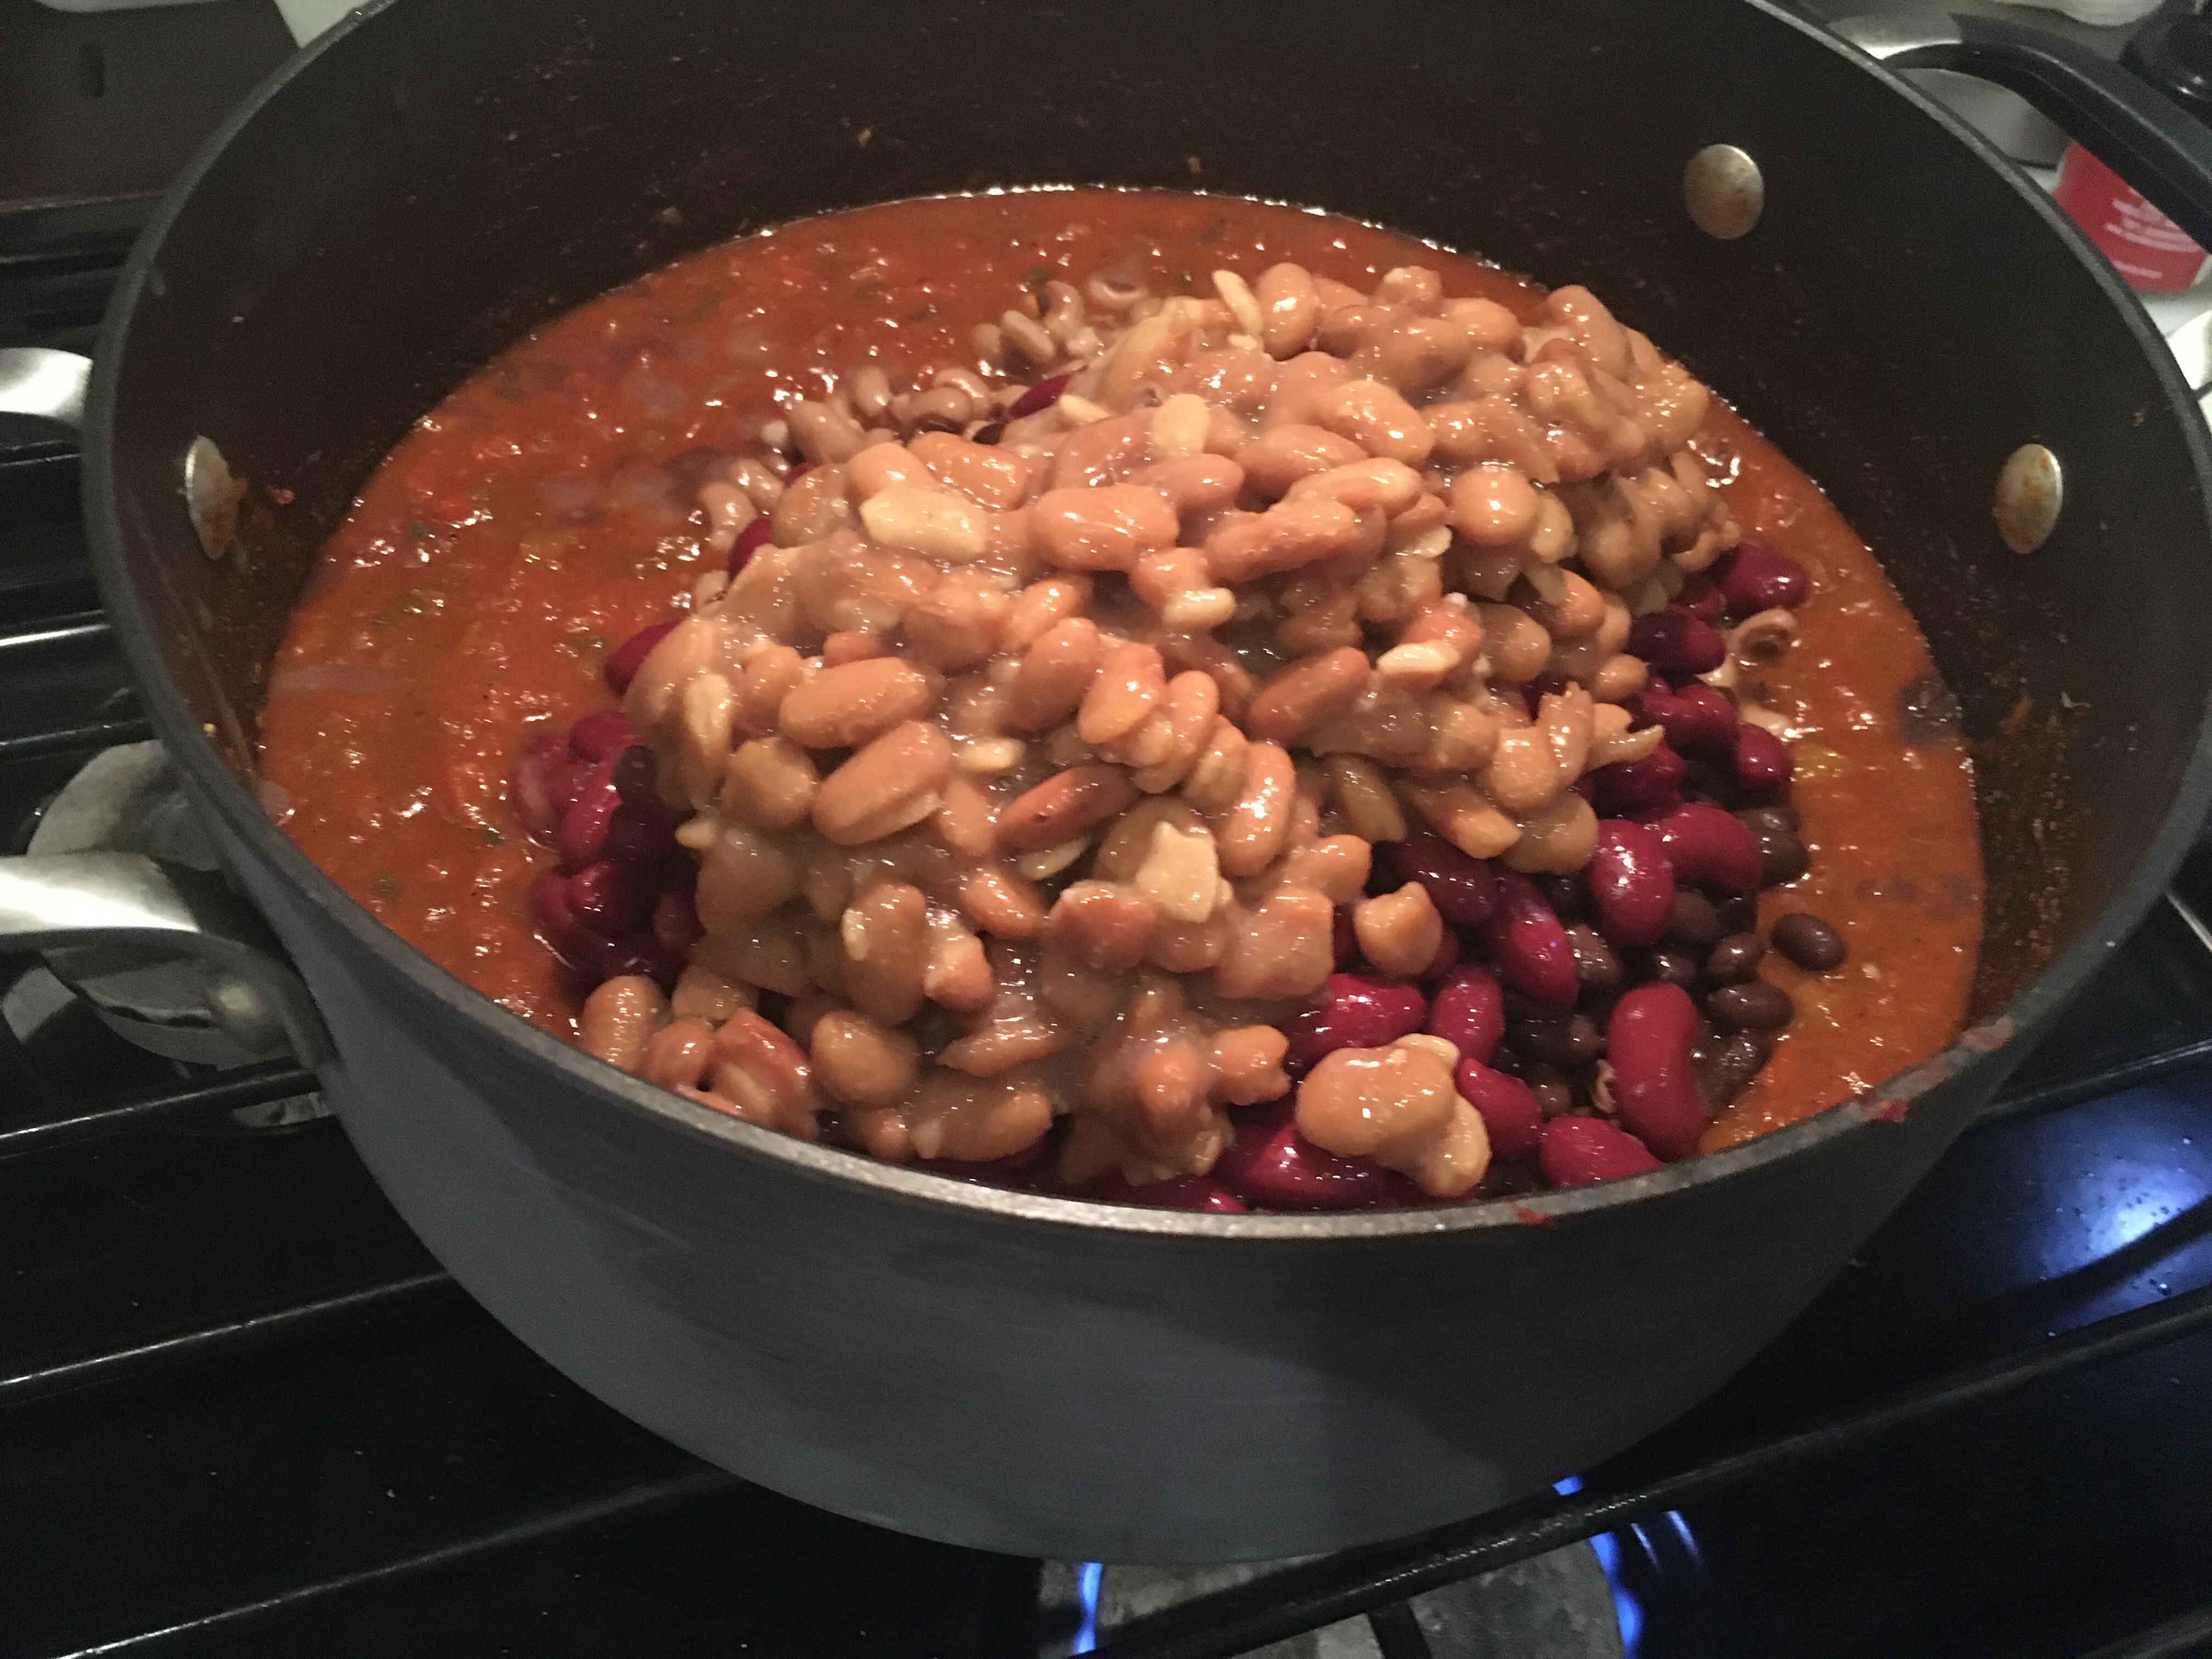
    Add remaining ingredients and simmer for one hour.

    Sprinkle with cilantro and serve

    For the Instant Pot:

    1. Place the chicken, UNCOOKED, and the remaining ingredients into the pot of the Instant Pot and stir to combine. Put the lid on the Instant Pot and lock it into position. Make sure the vent is in the sealing position.
    2. Set the Instant Pot to manual high pressure for 18 minutes (or the chili setting which will automatically be 18 minutes at high pressure). When the cook time is finished, let it naturally release for 10 minutes and then quick release any remaining pressure. Shred the chicken with two forks (either in the Instant Pot, or remove it to a cutting board to shred and then return it to the pot).
    3. Stir to combine. Sprinkle with cilantro and stir.

    For the slow cooker:

    1. Place the chicken, UNCOOKED, and the remaining ingredients in the crock of the slow cooker and stir to combine.
    1. Cook on low for 6-8 hours, or high for 3-4 hours. Shred the chicken with two forks (either in the slow cooker, or remove it to a cutting board to shred and then return it to the slow cooker)

    Notes

    If you’re making this chicken chili in the Instant Pot, you can use fresh or frozen chicken breasts. The cook time will stay the same regardless. If you’re making it in the slow cooker, use fresh or thawed chicken breasts for food safety reasons.

    “Carnitas” in Spanish means “little meats” and I fell in love with pork version of carnitas in Mexico long ago and they have always been one of my favorite Mexican dishes to cook in my slow cooker. I use these tasty, meaty bites in tacos, burritos, nachos and even soups. I usually try to make a double batch because they freeze so well and it’s so easy to just thaw out and serve on a week night! The only problem is they take so long to cook. If you braise them in the oven, you are looking at at least 4 hours and slow cooker is an even longer time of 6-8 so last year when I got my Instant Pot for Christmas, I knew just what recipe I wanted to try….my favorite recipe of Pork Carnitas with Mojo Sauce topped with a delicious, fresh Pineapple Salsa and it can be done in ONE HOUR!

    If you have recently gotten an Instant Pot and don’t know how to use it, this is the recipe for you! Several people have told me that they are afraid of theirs but there simply isn’t a reason to be. This is not your grandmother’s pressure cooker! An added bonus is that you can actually sauté vegetable and sear meats allowing you to do everything in one pot. It can also be used as that slow cooker that we are all used to; it simply does it all from creating sensational soups to even making yogurt and steamed rice! But for now, let’s focus on these incredibly savory Pork Carnita

    Instant Pot Carnitas with Mojo Sauce and Pineapple Salsa

      1 (4-5 pound) lean boneless pork roast, excess fat trimmed, cut into 2-inch chunks
      2 tablespoons each of : salt, pepper, mustard powder, cumin, garlic powder, onion powder and paprika
      3 tablespoons of olive oil, divided
      1 batch mojo sauce (see below)
      1/4 cup freshly chopped cilantro
      Corn Tortillas (for low carb options use Boston Lettuce or Jicama Rounds microwaved for 5 seconds)

    Mojo Sauce

      1 cup beer (or chicken stock)
      1 head of garlic, cloves separated, peeled and minced
      1/2 cup fresh orange juice
      1/4 cup fresh lime juice
      1 teaspoon dried oregano
      1 teaspoon ground cumin
      1 teaspoons salt
      1/2 teaspoon freshly-cracked black pepper

    Pineapple Salsa

      2 cups finely-diced fresh pineapple
      1/2 cup finely-chopped fresh cilantro
      1/2 cup finely-diced red onion
      2 tablespoons lime juice
      1/2 teaspoon ground cumin
      1 jalapeño, seeded and finely-diced
      salt and pepper

    DIRECTIONS:

    In a medium mixing bowl, prepare the mojo sauce (see below).

    Mix spices together with 1 tablespoon of the olive oil to create a seasoning paste.

    Season pork chunks on all sides with seasoning paste.

    Click the “Saute” setting on the Instant Pot. Allow to heat up and add remaining oil and half of the pork, and sear — turning every 45-60 seconds or so — until the pork is browned on all sides.  Transfer pork to a separate clean plate, and repeat with the other half of the pork, searing until browned on all sides.  Press “Cancel” to turn off the heat.

    Pour in the mojo sauce, and toss briefly to combine.

    Close lid securely and set vent to “Sealing”.

    Press “Meat”, then press “Pressure” until the light on “High Pressure” lights up, then adjust the up/down arrows until time reads 30 minutes.  If “Keep Warm” light is on, click to turn it off

    The Instant Pot will begin to build reassure and cooking time will begin once the red pressure button pops up. After 30 minutes, the beeper will go off and it will begin to release pressure naturally. This will take approximately 15 -20 minutes.  Carefully turn the vent to “Venting”, just to release any extra pressure that might still be in there. Then remove the lid.

    Turn on the oven broiler to High and transfer pork to baking dish.

    Shred and spoon about a third of the leftover juices evenly on top of the pork.  Then broil for 4-5 minutes, or until the edges of the pork begin browning and crisping up. Remove the dish from the oven, then ladle another third of the juices from the Instant Pot evenly over the pork, and then give it a good toss with some tongs.  Broil for an additional 5 minutes to get the meat even more crispy. Then remove and ladle the final third of the juices over the pork, and toss to combine. Sprinkle with fresh cilantro.

    Serve immediately in tacos, burritos, salads, or whatever sounds good to you! Pork can be refrigerated in a sealed container for up to 3 days, or freeze for up to 3 months.

    TO MAKE THE MOJO SAUCE:

    Whisk all ingredients together in a small mixing until combined.

    TO MAKE THE PINEAPPLE SALSA:

    Toss all ingredients together in a medium mixing bowl until combined.  Season with salt and pepper to taste, also adding in extra lime juice if desired.

    For more detailed directions and pictures, visit reciperealities.net

    Week 1 without any meat and what have I learned? A lot!

    First, I’m rarely hungry. My meals leave me satisfied and I don’t really have those in-between meal cravings. Second, while my goal wasn’t really to lose weight, I’m down 4 lbs! Finally, I can feel my taste buds changing as I enjoy what natural flavors are supposed to taste like without all those additives from processed foods. Do I miss meat? Not so far!

    I have learned a lot about healthy snacks, too. One snack that I knew was kind of healthy was air popped popcorn. However, until I did a little research, I never realized how healthy popcorn can actually be. Popcorn has something called polyphenols in it, which regulates the spread of cancers and helps prevent cardiovascular disease. It is also made of unprocessed whole grains so it gives you that much needed fiber which can help relieve that constipation you may be having with a plant-based diet. It actually even has more iron in it than spinach! So yes, I was missing my chips a little but now I know what to grab for a super healthy sugar-free snack!

    With that being said, most of today was being spent waiting to go for my yearly physical exam which means that if you have a 1 pm appointment, then there isn’t a lot of eating going on since you have to fast. So, all I have for you today is my super easy dinner and Boy, did I make it simple with a baked potato stuffed with broccolini!

    By making my own cheese sauce with non-fat milk and using whole wheat rice flour as my thickener, I kept this dish light yet super filling! If you are omitting dairy from your diet, soy milk is a great substitution. I served this with a side of white beans to up my protein. I rinsed and drained them then added a little water, tomato juice and red pepper flakes.

    Healthy Broccolini and Cheese Stuffed Potato – 2 servings

    Ingredients

    • 2 large baking potatoes
    • 2 tbsp olive oil, divided
    • 1 bunch broccolini
    • 1/4 cup water
    • 4 tsps whole wheat rice flour
    • 1 1/4 nonfat milk (or soy milk)
    • 2/3 cup freshly grated sharp cheddar cheese
    • 1 tsp dry mustard
    • 1/4 tsp paprika

    Directions

    Preheat oven to 400 degrees. Wash potatoes and pierce with a fork; Rub with 1 tbsp of olive oil and kosher salt. Place directly on the oven rack and bake 45 minutes to an hour depending on the size of the potato.

    While the potato is cooking, wash and cut the stem on the broccolini. In a small pan, cover and steam with 1/4 cup of water on low until desired tenderness about 8-10 minutes.

    For the cheese sauce, whisk the flour with 1/4 cup of milk; set aside. 
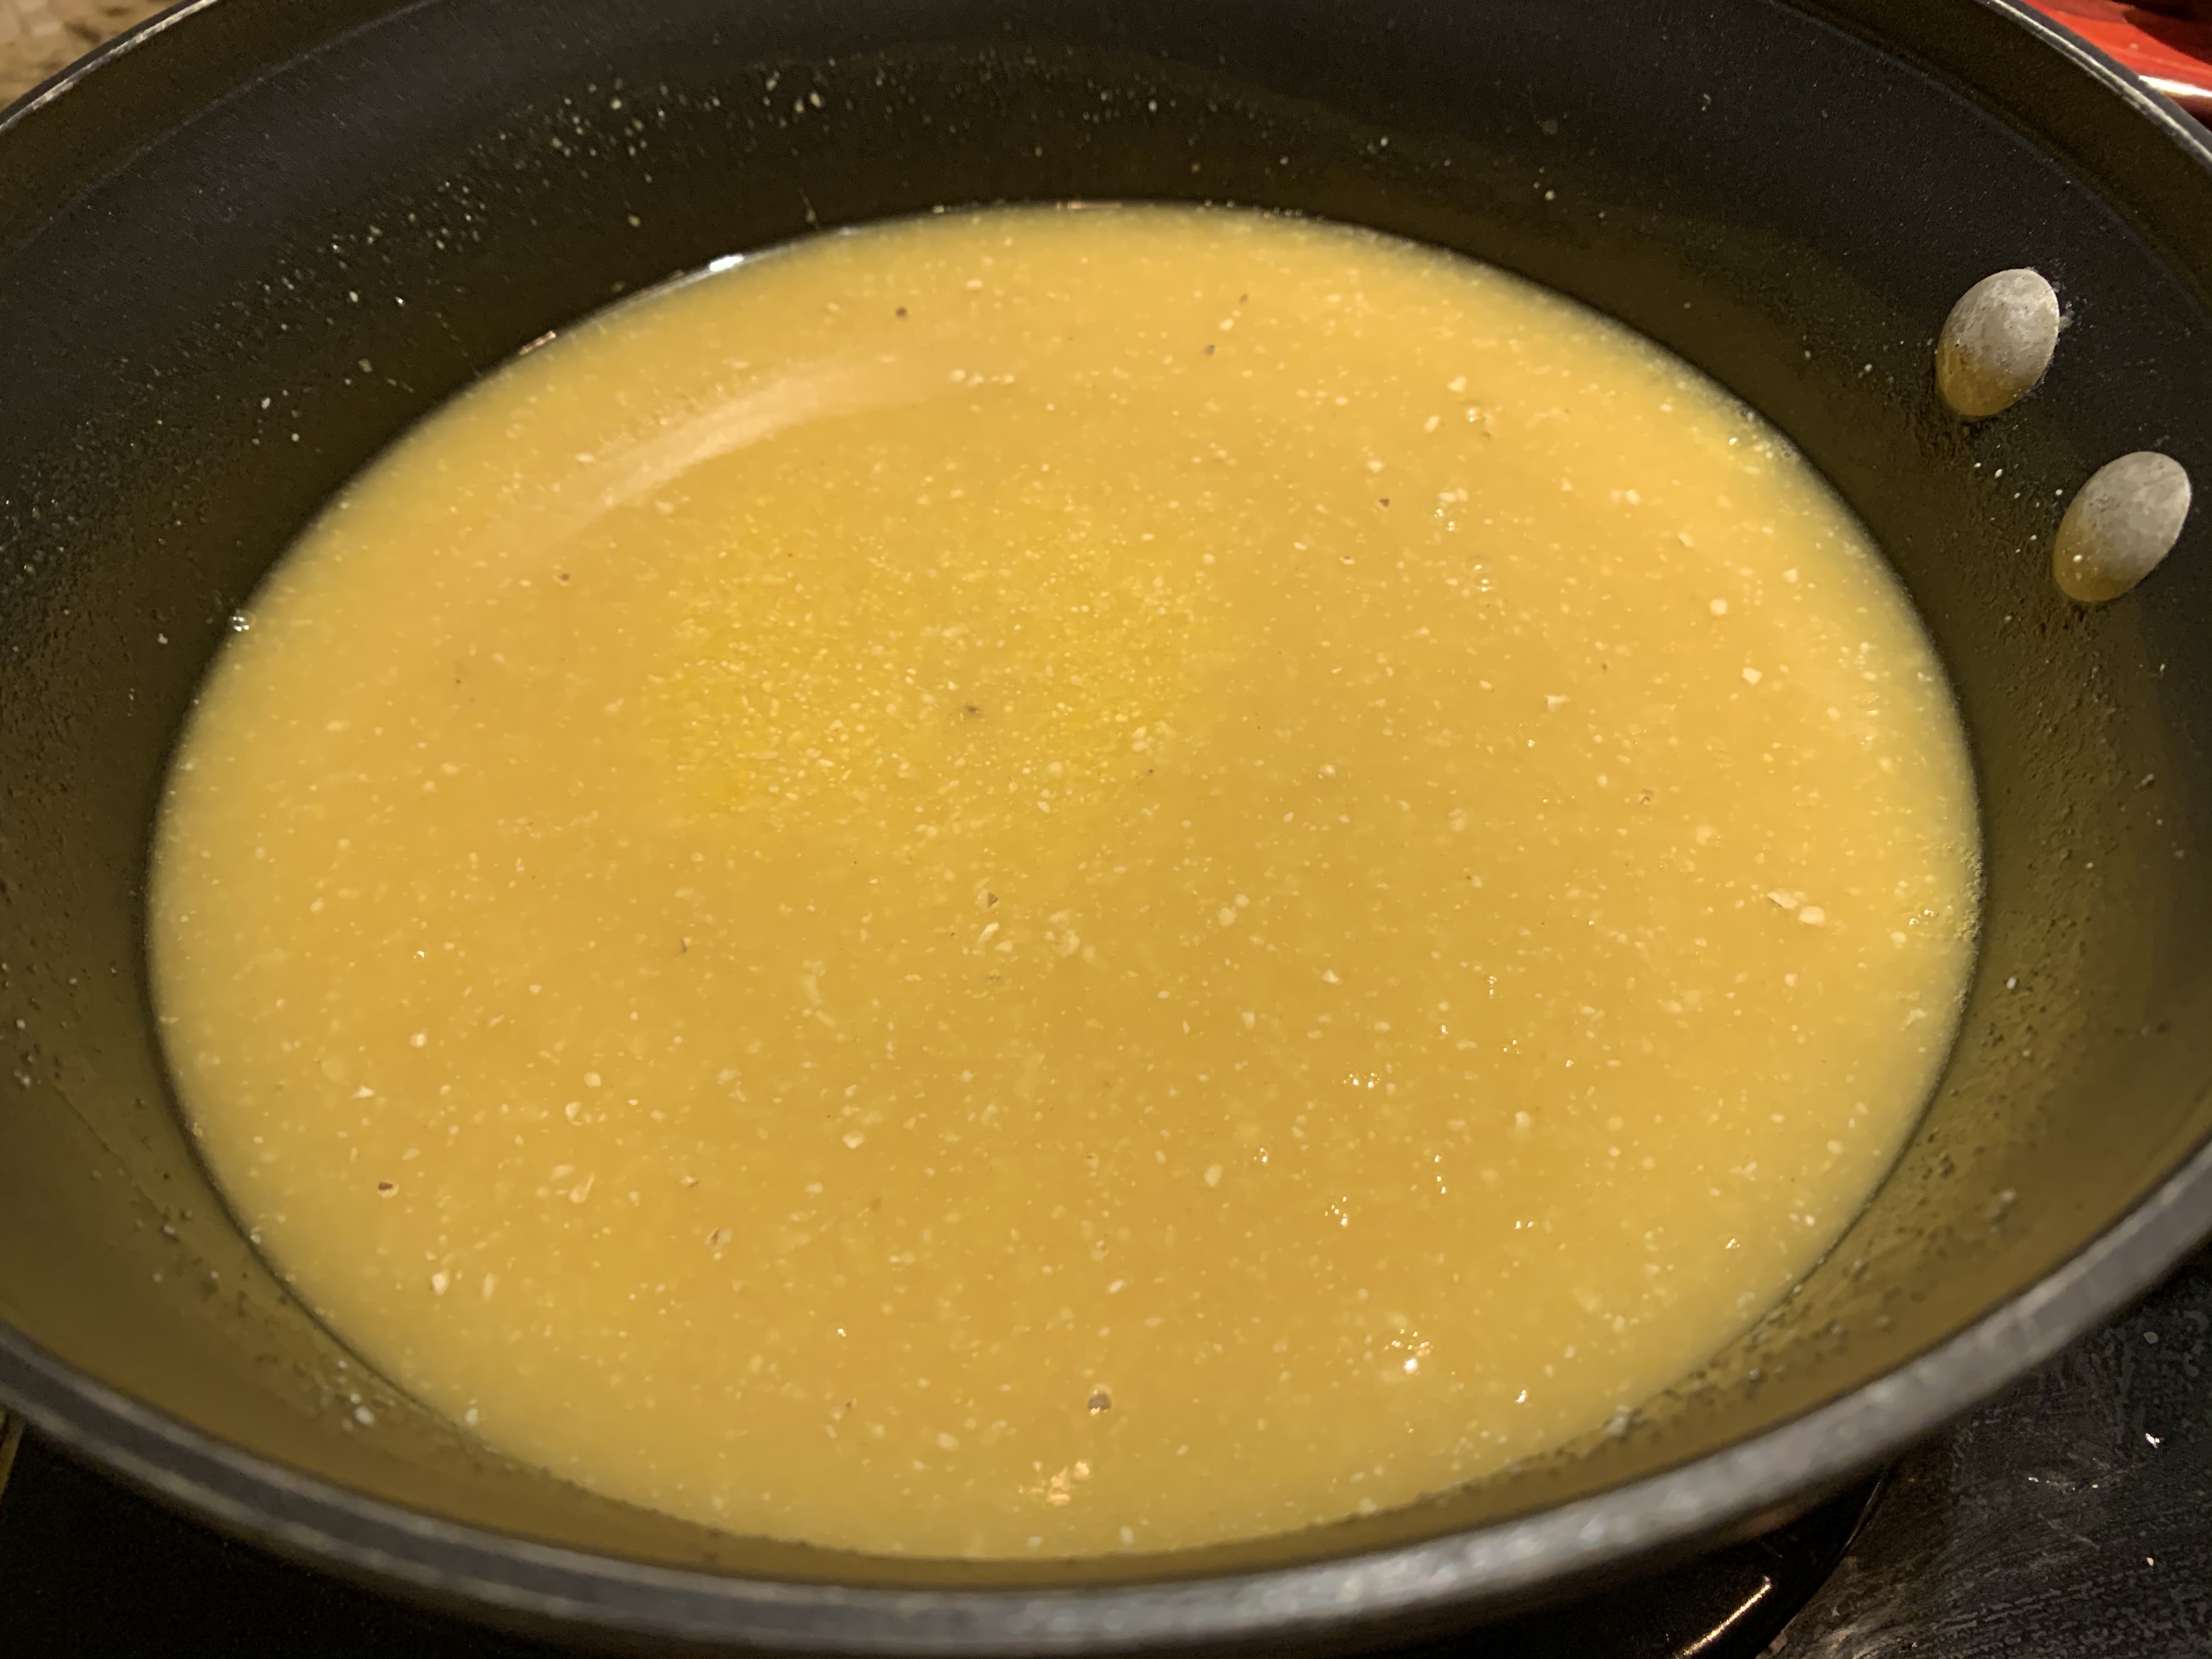
In a small saucepan, heat the milk on medium-low until it starts to steam. Add the flour mixture and whisk constantly until the sauce thickens. Season with the dry mustard, paprika, salt, and pepper.

    To serve, cut the potato and fluff with a fork. Season with salt and pepper and add a pat if butter, if desired. (Clarified butter or ghee is best).

    Top with broccolini and cheese sauce.

    Serve with your favorite healthy side such as a cup of beans or a small salad.

    Bottom Line: This was amazingly easy on a busy day and very satisfying. White potatoes always get a bad rap but are loaded with fiber, potassium, and vitamins C & B6. Obviously, you can substitute sweet potatoes as well. The beans along with some sliced tomatoes created a well-balanced meal that Jeff and I both enjoyed!

    January Journey Plant-Based Diet Blogs Taking a Weekend Break!

    Hey guys, I’m headed out of town for a long weekend of camping and I don’t have great service so my blog will resume on Sunday with all the great dinners and recipes I had on the trip! Have a great weekend!